Search This Blog

Sunday, July 3, 2011

Book Review: The Complete Gun Owner by James M. Ayres

There are few things I enjoy more than shooting, but sometimes Mother Nature just does not want to cooperate.  So there are often times when I have to find some other way of occupying myself.  Luckily, for the firearms enthusiast, there are many related endeavors for which we can use our "down time," such as cleaning our firearms, reloading, rearranging our gun safe (yes, I have been known to do this), sorting ammunition, etc.  Rainy days also give me an opportunity to keep abreast of what is new in the world of shooting sports, by reading some of the sporting magazines that are available, or picking up a book on firearms.  Most recently, I picked up a copy of The Complete Gun Owner, by James M. Ayres (Gun Digest Books, 2008), and would like to take this opportunity to give a review of this particular book.


(Image courtesy of amazon.com)  The Complete Gun Owner is written on a very basic level, with the intent, I imagine, to make the information contained therein accessible to readers who are just getting involved in the shooting sports.  The sub-title of the book is "Your guide to selection, use, safety, and self-defense," and the book undertakes to cover each of these areas.  It is 271 pages long, and contains many color photographs.  The book's appendices contain information about federal and state firearms laws; state game and wildlife agencies; a list of gun, safe, and case manufacturers; and a web directory.  An index, however, was not included.

The book is divided into four main sections (five, counting the appendices).  First is a section of gun selection. Second, a section on basic gun use, including how to shoot, the care and cleaning of your guns, hunting, and what the author refers to as the "Tao of Shooting".  Third, a section on gun safety.  And lastly, the book covers self-defense with a gun.  Each of these sections is further broken down into chapters, each focusing on a specific aspect of the overall subject (for instance, in the basic gun use section, there are individual chapters on how to shoot handguns, rifles, and shotguns).

One thing that impressed me early on with the book is that the first chapter is dedicated to making "A Case for the Twenty-Two."  Unlike some other shooting enthusiasts, I still feel that the .22 is a great cartridge, especially for the beginning shooter.  And the author points out that this cartridge is useful for helping a first time shooter become acquainted with the sport, without developing bad habits, such as "the flinch," which can be brought about by starting off with a high-recoil cartridge, such as a .357 Magnum or a .45 ACP.  So it was refreshing to see a book devote a whole chapter early on to recommending the .22 as a viable weapon.

It is in the very first chapter, however, that I also started taking issue with some of what the author was saying.   Ayres makes it clear early on that he is not a fan of the revolver.  On page 33, he states that semi-automatics are "subject to fewer mechanical problems under field conditions" than revolvers.  Really?  I would like a citation for that assertion.  I, personally have had mechanical failures with nearly every semi-automatic I have ever owned, some due to faulty ammunition, some due to bad magazines, some due to operator error, and some due to problems with the actual gun. I have yet to have a single mechanical failure of any kind with a revolver...  ever.  The closest I have ever come is a failure to fire due to a bad primer, in which case I simply pull the trigger again and "bang."  Revolvers are one of the most user friendly platforms for new shooters:  there is no slide to have to rack, one need not worry about "limp-wristing," no safeties to have to learn, etc.  The author also denigrates lever-action and bolt action rifles in favor of the semi-automatic (that is until page 104, when he talks about his bias "for" bolt action rifles for hunting...  er, ok...  which is it?).

Some of the firearms that the author recommends seem to be odd choices, based on the audience to whom he is reaching out.  For a book aimed at beginning shooters, the author recommends the Ruger Mk III and the Browning Buckmark,  two excellent firearms by most anyone's standards.  However, for someone who has had to disassemble and reassemble these pistols, recommending them to a novice seems like a bad idea.  Ayres also seems to recommend the Beretta Neos and Sig Sauer Mosquito, even though he states that he has no personal experience with either weapon, and he is just going by the reputation of the company.  Which is like recommending someone buy a Ford because they have such a great reputation -- on one hand you might wind up with a Mustang, but on the other hand, you might end up with a Pinto.

Aside from the wealth of opinion that the author shares in the book, there are also factual inaccuracies, poor editing, and photographs that do not seem to belong.  Did you know that the AK-47 is chambered in 7.61x39?  That's ok...  it's news to the Russians as well, as they are still operating under the mistaken assumption that it is 7.62x39.  And sure, this may just be one more instance of the editor missing something, and maybe it is not that big of a deal, or maybe it is to the new shooter who is now looking for a non-existent cartridge.  Then there is the assertion that the Remington 552 BDL is basically the same gun as the 597, "without the fancy checkering."  Sure...  other than the fact that the two guns have completely different actions, the 552 has a tubular magazine while the 597 has a removable 10-round magazine, and the 552 will chamber and fire .22 Short and .22 Long as well as .22 LR, whereas it could be dangerous to attempt to do so with the 597.   But yeah, other than that, the same gun.

Then the author offers up such gems as "eighty-five to ninety-five percent of the effectiveness of any shot is determined by shot placement," in big, bold font on pages 167-168.  Yet nowhere does he offer any statistical evidence to back up this claim (one might as easily say that 100% of the effectiveness of any shot is due to shot placement, in that if you miss the target completely, it will have no effect at all).  Or when he states that twenty-two pistols are commonly carried by Israeli assassins (and likewise U.S. operatives) because they "might only receive a few days training and practice with a handgun" (page 195).  Citation, please?  And this brings us back to the chapter on twenty-twos in that Ayres states on page 29 that the .22 is commonly used in a defensive role by "individuals and members of certain organizations."  Well, I guess if Israeli assassins can be trained to use a .22 in a few days, then why should a novice gun owner be any different, right?

On page 179, Ayres discusses the handgun shooting positions used in defensive shooting.  The first position he covers is hip shooting (no relation).  In the first paragraph, he states that "(m)any experts deride hip shooting as being totally useless....  Perhaps they are setting their sights incorrectly."  Setting their sights incorrectly?  OK, well, Mr. Ayres is holding himself out to be an expert on firearms, not anatomy, after all.

Poor editing is, in my opinion, the primary problem with this book, and it is most clearly evidenced by photographs that are placed throughout the text in a seemingly random fashion.  For instance, chapter 5, "How to Shoot a Shotgun," is illustrated with a total of nine photographs:  seven photos of someone wielding a Ruger Mini-14 semi-automatic rifle, one photo of a handgun's sight picture, and one photo of someone wielding a single-shot rifle.  Not a picture of a shotgun to be seen.  Other masterful touches of editing include two copies of the same exact photograph on the same page (Wait, this looks familiar... where have I seen this photo before?  Oh yes, in the aforementioned shotgun chapter.), one with the caption "Correct sight picture," and the other with the caption "Correct sight alignment." There is also a firearms terminology section at the beginning of the book  in which the terms are not in alphabetical order. And let us not forget the editorial comments that were left in the text when it went into print, such as when the editor asked the author to provide "some specifics that make it a "good shooter," when referring to the Savage Model 64.

Taking all of this into consideration -- the overly opinionated approach by the author, the poor editing, and the reliance upon anecdote as opposed to documentary evidence -- means that I just cannot recommend this book to anyone, especially someone new to firearms.  While there may be nuggets of wisdom hidden in this book, there is also enough that is inaccurate or misleading to cause confusion in someone who is just getting his or her feet wet in the shooting sports.  I would look to other texts, such as those penned by Massad Ayoob, if you are looking for well-written, accurate books on firearms, shooting, and self-defense (The Gun Digest Book of Combat Handgunnery is just such a book).

Tuesday, June 21, 2011

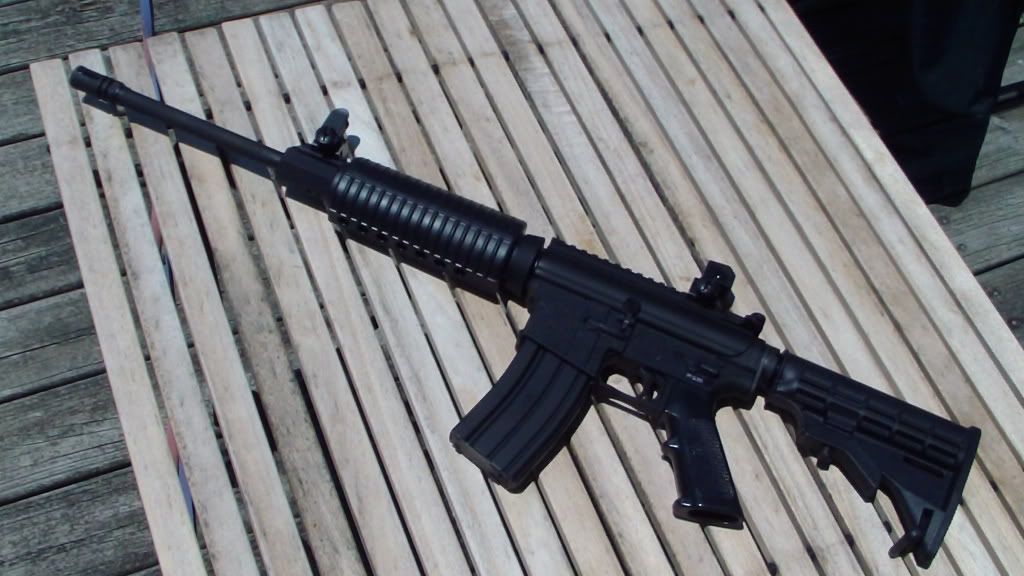
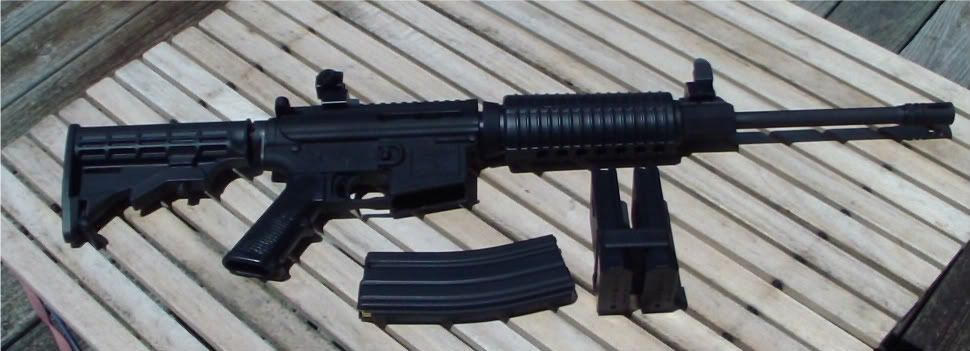
The $500 AR 15 Project -- My Plum Crazy DPMS Sportical

The AR 15...  for many, it is the end-all be-all of rifle platforms.  And for good reason:  it can be just about anything you want it to be.  From short barrel patrol rifle to long range, heavy barreled varmint gun, the modular nature of the AR 15 lends itself to customization like no other weapon.  Stocks, handguards, pistol grips, sights, barrels, gas blocks, fire control groups...  there is nothing on an AR that cannot be made to match a particular shooter's preferences.  Even caliber is up for grabs:  the standard 5.56 / .223 can quickly become a .204, 5.45, 6.8, 7.62, 9mm, or even .22LR.  The choices are seemingly endless.

And in spite of this, I have never owned an AR platform.  And to be honest, until recently, I have not felt as though I have been missing anything.  I have been very happy with my .22s, my SKS, and my milsurps.  And I suppose I still thought of the AR in terms of the original M16s that our boys in 'Nam got saddled with -- clumsy, prone to jam, impossible to keep clean, and generally disparaged by those veterans who chose to share their stories with me about their time in the service.  Now, a lot has changed since the Sixties (thank God), and the AR has benefited from some technological enhancements that have made the platform much more reliable.  The direct impingement gas system still needs care and cleaning, but you need not be fanatical in your fastidiousness anymore.

Recently, I had a change of mind, and decided I would like to join the thousands of AR enthusiasts and see what I have been missing.  And to do so, I also decided to undertake a sort of self-imposed challenge:  to build a lightweight AR, and to do so for $500.

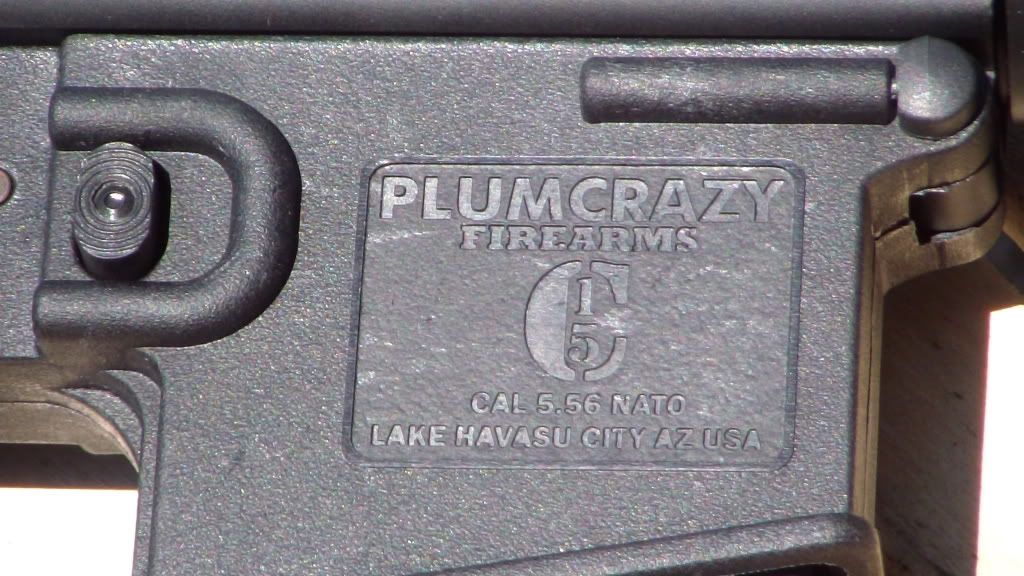
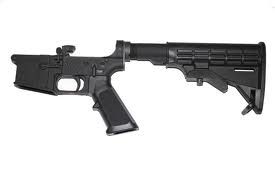
Now, those of you who have ARs know that this is a nearly impossible task.  Nevertheless, I had an ace up my sleeve.  There is a company in Arizona called PCF manufacturing who turns out polymer AR lowers (C-15) under the name brand "Plum Crazy."  These lowers are made of a "space-age" teflon-impregnated polymer, designed to near mil-spec dimensions, meaning that they will mate with just about any mil-spec AR 15 upper. And these lowers cost $130...  complete.  That's right, this is a complete lower, including fire control group, bolt catch, mag release, and six-position collapsible stock, all for $130.  Interestingly, the fire control group includes a polymer hammer and trigger, the mag catch and release are polymer, and even the take-down pin and pivot pin are polymer.  All of this equals reduced weight.

(Image courtesy of clark-corner.com)  Before I went Plum Crazy, I did a lot of research on the product.  I have had several polymer pistols, as well as polymer stocked rifles (a .30-'06 and an SKS, for example), so I am not too worried about the polymer not being able to handle the stresses involved.  Especially considering the majority of stress is absorbed by the upper on an AR.  I did come across a few instances of lowers that had broken, but for every bad experience I found, I read three or four positive reviews.  And more often than not, the naysayers were not owners of the Plum Crazy firearms, but "knew a guy who had a friend who's brother had one blow up..."  Not exactly dealing with raw data in that situation.

Most importantly, however, is that the company PCF Mfg. offers a 100% lifetime warranty on their products. I dig a company that will stand behind its product.  And even the few people I found who had experienced broken receivers (usually their own fault due to dropping the gun or torquing the receiver while trying to mate it to the upper) had found the company quick to replace their lower.  And they are made in the USA.  I figured it would be worth a try.  It certainly helps my bottom line, both with weight and cost.

Luckily for me, a local gun shop, Brackin's Gun Alley stocks the Plum Crazy (March 2013 update:  unfortunately, I can no longer recommend Brackin's Gun Alley, and I will just leave it at that).  I was able to pre-order one for $130, which means that after background and tax, I was out $153.  When I got the receiver, I was suitably impressed.  The lower seemed well made, and was thicker and stronger than I had imagined.  The finish has a few minor molding remnants on it, but could be easily removed.  The trigger was what astonished me, however...  while not a match group by any stretch, it is very crisp, with little to no slop, and breaks cleanly at between  4.5 and 5 lbs.  Extremely good for a stock trigger in this day and age.  The one thing that I found fault in is the safety.  An AR safety is designed such that it cannot be engaged if the hammer is in the forward position -- the hammer must be cocked back before you can put the safety on.  The Plum Crazy safety, however, can be engaged while the hammer is forward.  Not a deal breaker, but it means it is not mil-spec in this regard, and is something that prospective owners should be aware of.
Now that I had my lower, I needed an upper to go with it.  In keeping with my light weight requirement, I knew I was going to be looking at a pencil profile barrel, most likely the minimum 16".  I also decided to look at some "slick side" receivers:  receivers that do not have the forward assist, shell deflector, or dust cover.  As a lot of AR fans will point out, these uppers are not mil-spec, but then, neither am I.  I am not going to be heading out to the sandbox anytime soon, so I really do not need the dust-cover...  this is a plinker, plain and simple.  Forward assist is just a way of getting a few more shots in before cleaning your gun, or for forcing a frozen bolt forward in sub-zero temperatures, and is not necessary for my purposes, either.  And lastly, as a righty, the shell deflector would do me no good at all.

So, keeping this in mind, I decided to go with the DPMS Sportical 5.56 upper from MidwayUSA.  The Sportical is designed on the lo-pro receiver, meaning flat-top, no sights, and a railed gas block.  It is designed for someone who is going to add optics to their AR (which I am...  I have a red / green dot sight that needs a good home).  It also comes with your choice of pencil profile or heavy barrel, both in 1 in 9" twist.

(Image courtesy of midwayusa.com)  Well, it just so happens that MidwayUSA had these uppers on sale for $360.  So I ordered one.  I got it via UPS today, and I assembled the lower and upper this afternoon.  Having read about the tight fit many Plum Crazy owners were experiencing, I was poised to expect a difficult time assembling the rifle.  It was not to be, however:  the pivot went together quite easily, and the rear of the receivers popped right together with just a little pressure from the heel of my hand.  Both pins went in snugly, and the two halves fit as though they were made for one another.

I finally had my AR.  And I came in just over my goal of $500, at $513.  Well, almost.  I forgot the magazine.  A quick trip down the road to the gun shop fixed that.  Add a 30 round steel magazine for $14, and that brings us to a grand total of $527.  If it weren't for Tennessee's insane sales tax and the background check, I would have made it.

So, I didn't make my goal of $500, but I came close enough to make me happy.  This rifle isn't going to make the front page of ARF.COM, and I am sure that many AR purists will turn their noses up at it, but it fits me well.  I quite like it so far.  Especially the way this gun shoots.  It is almost ridiculously light, just over 6lbs with red dot and 30 round magazine.  I may look at adding back-up iron sights at some point, but for now, for my purposes, the red dot is sufficient.  I think it is going to be a great little rifle.  I have put 25 rounds through it (Federal .223 bulk box 55 gr. FMJ), to sight in the red dot, and to break in the barrel, cleaning after each round per the instructions from DPMS.  Each round chambered and fired flawlessly, spent brass was positively ejected to my right, and the plastic lower hasn't blown up yet.  When I get through the break-in process, I will post some pictures or a video of how it is shooting.  It may be time to break out another Osama bin Zombie target!!

Update:  I picked up a set of iron sights at Tri-Cities Gun Depot this week, and switched them out for the red dot.  Here are some pictures of the Plum Crazy Sportical setup:


Monday, June 6, 2011

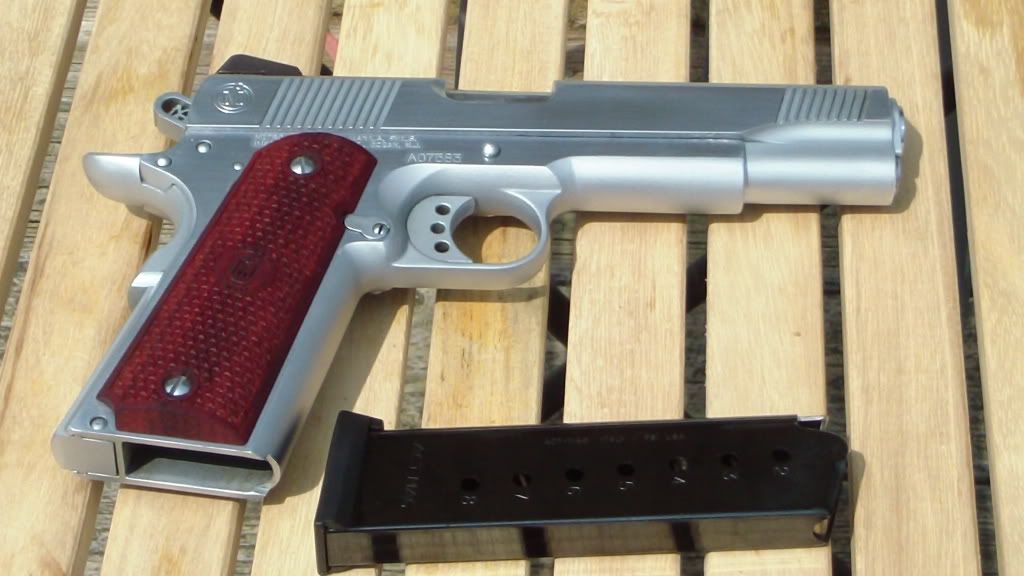
MetroArms American Classic II -- EGW magazine catch and Pearce grip insert review

This episode of Shooting from the Hip is a follow-up to my review of the MetroArms American Classic II model 1911 pistol.  Specifically, I recently completed my first two upgrades, and I wanted to share with you what I changed, as well as why I did so.

Now, you may be asking yourself why, if I like the ACII so much, I felt the need to change something.  Well, for one thing, it is a 1911, after all, and one of the beautiful things about this pistol is that it is a platform that begs one to customize it to one's own preferences.  From grips, to sights, to triggers, hammers, even guide-rods, there isn't much on the 1911 that cannot be tweaked to fit the individual shooter.  In this particular case, my first upgrade was to add a Pearce rubber grip insert.


(Image courtesy of pearcegrip.com)  Now, while I am a big fan of wood grips on a 1911, the slim aspect of the 1911 doesn't fill my hand very well.  I have big hands, and I am used to double-stack guns that are wide enough to fit my hand well.  Part of the attraction of the 1911 though is the slimness, making it a good carry pistol, easy to conceal, so I did not want to lose that aspect.  My choice, therefor, was to try the Pearce grip insert:  a rubber insert that adds finger grooves to the frontstrap, while not greatly altering the thickness of the grip itself, and still allowing the use of the wood stocks.  Installation could not be simpler:  simply unscrew the grips, put the grip insert on aligning the precut holes over the grip screw bushings, then replace the grips.  The insert is cut generously, leaving some trimming to be done, but an X-acto knife makes quick work of that.

Range time with the new grip definitely showed a difference in the handling of the pistol.  The rubber grip afforded me a firmer grasp on the firearm, and it seemed to point more naturally.  Whereas before I installed the Pearce grip, recoil would occasionally cause the pistol to shift in my hand, I found that this was no longer the case with the new finger grooves.  Speed and accuracy of follow-up shots increased perceptibly.  I am curious as to whether the grip will prove to be durable, since the rubber under the stocks is rather thin (by design, of course), but time will tell.

The second modification I made to my ACII was to install a new magazine catch.  The one issue I have had with the pistol is that on a couple of occasions, it has failed to chamber a round when I have manually racked the slide.  I have not had this issue when using the slide release, only when "slingshotting" the slide.  This issue has been mentioned on a couple of firearms forums, as well.  It seems that the magazine catch on the ACII may be a bit low, allowing the magazine to sit a fraction of an inch lower in the magwell than normal.  This causes the top round in the magazine to have a bit of a higher jump to make it into the chamber.  Not much of an issue with round ball, but it can cause hollowpoints to jam.  As I intend to use this gun for home defense and possibly self-defense, it must reliably cycle hollowpoints.

One solution to this problem that I discovered on the M1911 forum (a great place to find information about this amazing weapon platform) was to change out the factory mag catch with a replacement that is machined to hold the magazine higher in the magwell.  One such product is manufactured by the company EGW, or Evolution Gun Works.  The HD Higher Mag Catch is available in either blued or stainless, is milled from solid 4140 Chromoly steel, and is designed to hold the magazine .020 inches higher than a standard mag catch.

While the company states that the part should fit "in most good quality 1911s," like any other "drop-in" 1911 part, some fitting is often required.  This was the case with the ACII:  a couple of minutes of light grinding and buffing, and the catch fit perfectly.  And it works as advertised.  The factory catch allowed the magazines to sit just a fraction of an inch lower in the magwell, and I could hold up on the bottom of the magazine and it would move ever-so-slightly up.  With the EGW catch, the magazine base is flush with the bottom of the magwell -- a nice, tight fit, holding the top round in a more direct line with the chamber.  Hand racking the slide several times with three different magazines showed that the rounds fed much easier into battery.  Pressing the EGW catch still allows the empty magazines to fall away freely, as well, so there should be no issue with tactical magazine changes.

After another 50 rounds (Federal 230 gr. FMJ) through it today, with no failures of any kind, the American Classic II by MetroArms continues to impress me.  It is definitely worth looking at if you are interested in a 1911.  I would also recommend looking at what EGW has to offer, with respect to aftermarket 1911 parts.  The website is easy to navigate, ordering was simple, and delivery was fast.  Three things I look for in an online seller.  You might also check out what Pearce has to offer, not only for the 1911, but for a variety of other pistols as well.

Monday, May 23, 2011

Metro Arms American Classic II -- First Shooting Video

Had a few free minutes today, so I thought I would take a quick little video of some range time with my Metro Arms American Classic II.  Not the best shooting, and not the best video, but I am working on both.  All told, I put another fifty rounds through my ACII today, all Remington 230 grain JHPs, without a single failure of any kind.  Here are the last four magazines worth -- 8 rounds in the ACT magazine that comes with the pistol, 7 rounds in my Springfield magazine, 7 rounds in my Kimber magazine, and the last six shots were also in the Springfield mag.  At a distance of about 15 yards.


(Note:  The shots on the left hand target are from an earlier session with my wife shooting her Ruger LCR.)

The more I shoot this ACII, the more I like it.  The action is tight, yet slick, and seems to be getting better the more I shoot it.  Absolutely no problems at all with the jacketed hollow points, even cheap Remington bulk box rounds.  I would like stocks with a little more "grip," as the factory stocks are a little smooth for my taste, so that may be my first real customization.  Still, it is a great gun for a great price.  I cannot wait for the Amigo to make its way to my locale, as I am really looking forward to getting my hands on one.

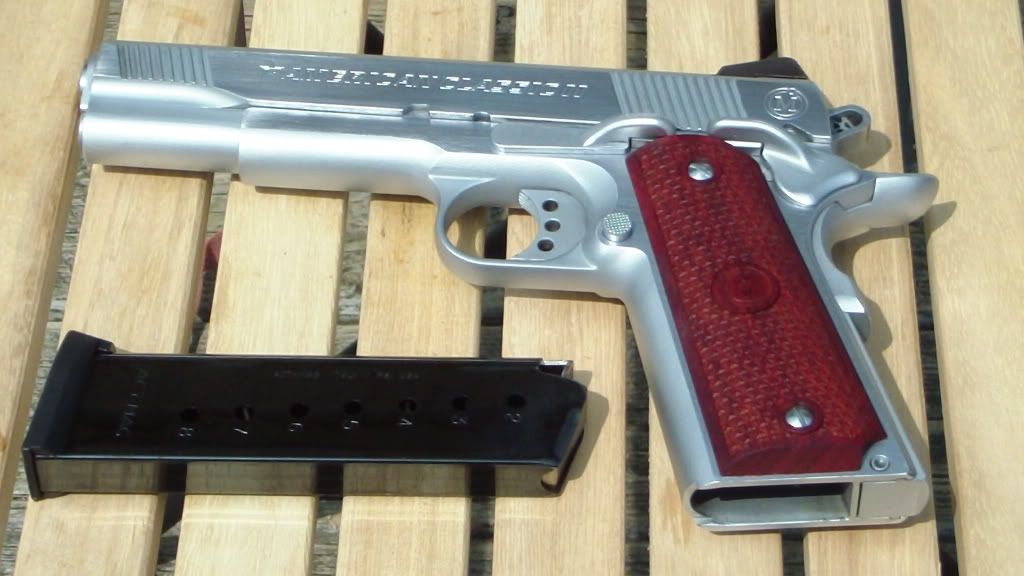
Thought I would throw in a couple of pictures of the hard chrome ACII:

Monday, May 16, 2011

Gun Review: Remington 878 Automaster semi-automatic shotgun

I have not added to Shooting From the Hip in a while, but it was not without reason.  I recently acquired a new camera, the Samsung Q10 camcorder, which I hope to be using in the near future to begin filming video segments for SFTH.  I am still getting acquainted with it, but I think it will be a great little camera, and I used its still shot capability for today's entry.  And be warned:  today's entry is a little long, because we are going to go in depth on this particular firearm, but I hope it is beneficial to some of you out there.

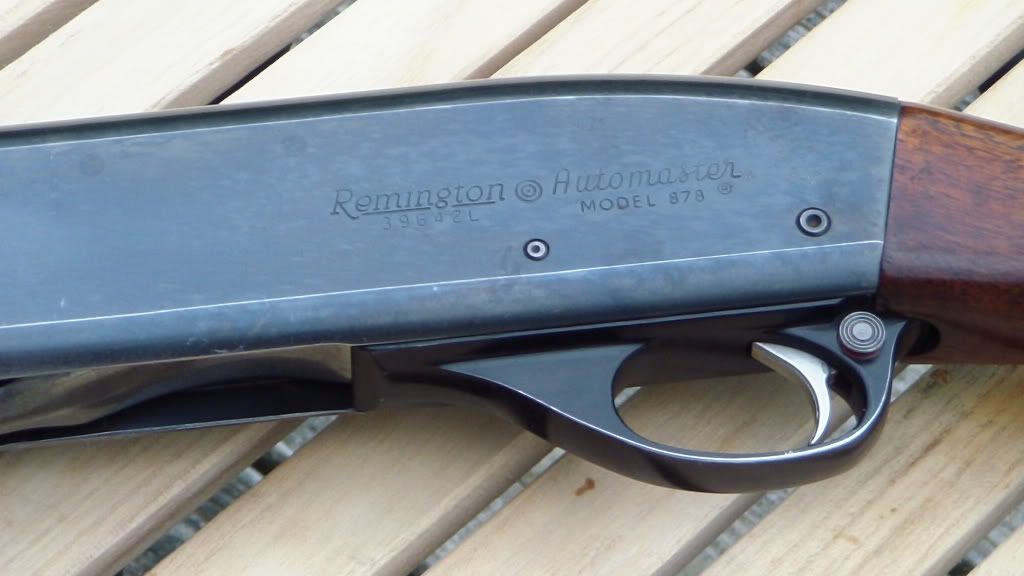
Speaking of today's entry, I have decided to look at one of my more recent acquisitions, considered by some to be an "obsolete" firearm, but which I have found in the short time I have had it to be anything but obsolete.  It is the Remington 878 Automaster.  I know several of you may be scratching your heads thinking I must be mistaken, but this is not a misprint.  Everyone has heard of the model 870 Wingmaster, one of the finest pump-action shotguns ever produced.  Very few have heard of its sister, the 878 Automaster, a semi-automatic shotgun based on the 870 architecture.  And with good reason...  the 878 was only manufactured for five years, with somewhere in the neighborhood of 63,000 (give or take a few) Automasters produced.  These were heady days for Remington, a company at the top of its game and which was putting out some of the finest firearms in the world.  It was also a time for innovation and experimentation, and Remington was making the most of it.  During the early part of the 1960s, Remington was manufacturing and marketing no less than four different autoloading shotgun designs:  the model '48 ('48 - '68), the model 58 ('56 - '63), the model 878 ('59 - '63), and the model 1100 ('63 - present).  Eventually, the 1100 design won out, but many feel that all of their designs were effective platforms.

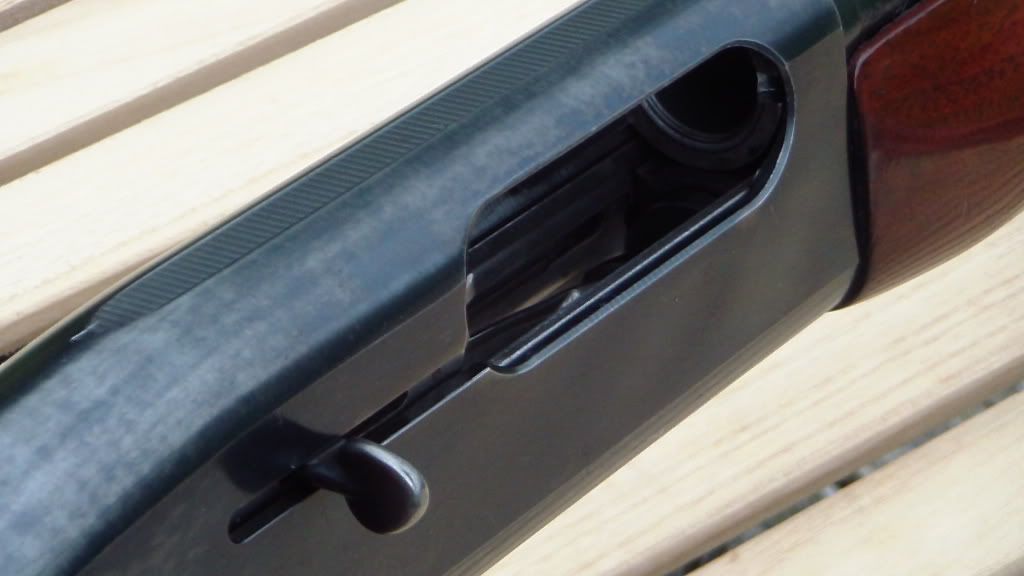
The 878 utilizes a gas piston operated by siphoning off combustion gases from the barrel.  Two gas ports located in the barrel ring direct the gases down into the magazine cylinder, where the piston assembly is located.  The piston is then forced backward, operating the action bar which opens the bolt, ejecting the spent round, while the next cartridge is pushed out of the magazine, into the receiver.  The piston return spring then forces the piston and action bar back forward, allowing the bolt to return into battery, directing the new cartridge up and into the chamber.  It is a slick, easy action in operation, and the mechanism greatly reduces felt recoil as so much energy is redirected into operating the piston.  And, unlike the model 58, there is no need to adjust the gas feed for different power cartridges.

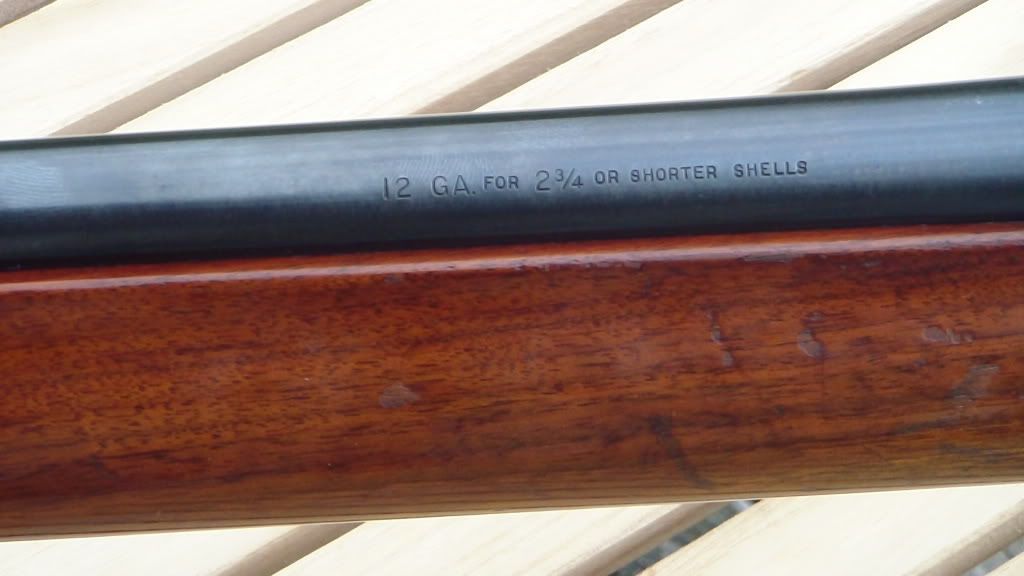
One downside to having the piston located in the magazine cylinder, however, is that the capacity of the magazine itself is reduced.  The 878 has a magazine capacity of two shells (with one in the chamber making a total of three shots) -- the space that in the 870 is taken up by shells three through five is now home to the piston assembly and the return spring.  This is not an issue for me in that I am limited to three shots by law for migratory birds, anyway.  And since the 878 was designed to use 2.75" shells only, I will not be using it for turkey or deer hunting, so migratory birds and clay pigeons will be my primary use for this gun.

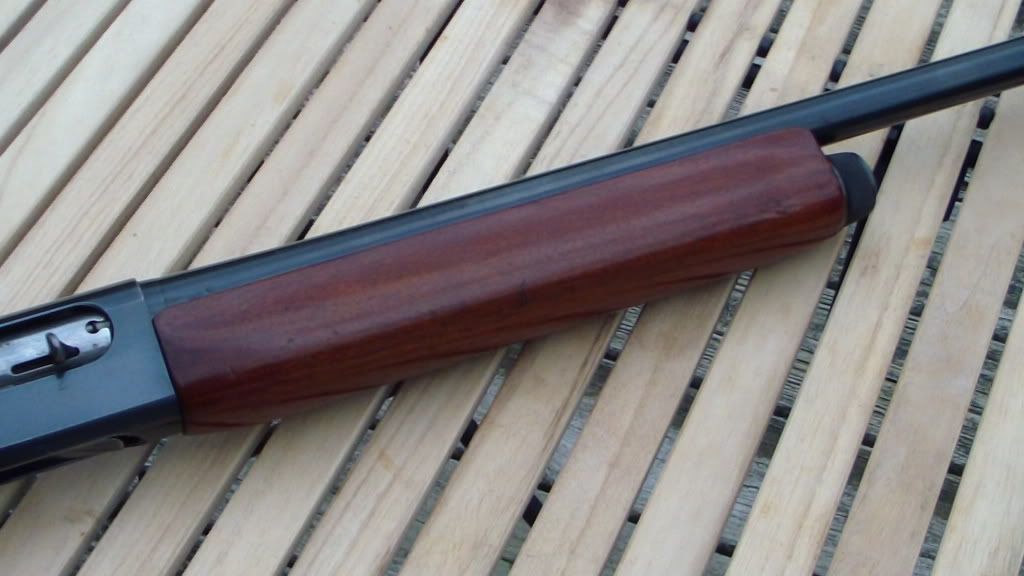
My Automaster is a 12 gauge, 28" barrel with a fixed modified choke.  I of course got it used, and it came with no paperwork, so I called Remington to obtain a copy of the owner's manual, which they are sending me (more on this later).  According to the very friendly and helpful gentleman I spoke with at Remington, it was manufactured in 1960.  There is some light rust in one spot on the receiver, as well as a small spot on the bolt, which I need to touch up, and the bluing is a bit thin in several places.  The wood is nice, but has several dings and scratches which I need to address, as well.  All in all, not too bad for a gun made fifty-one years ago.

I had a chance to test the Automaster by shooting some clays a few days ago.  I was using Remington Lead Game load, 12 gauge, 2.75", 7/8 oz., 7 1/2 shot... a very light load, which is what Remington recommends for this gun, as today's modern loads may be a bit too heavy for the antiquated gas system to handle.  I fired fifty rounds through the gun, without any malfunctions of any kind.  The action cycled well, very smoothly, ejecting the spent shells several feet away from me, even considering the light loads I was using.  As I said above, the felt recoil was negligible...  not like shooting a 12 gauge at all.  The gun is very light, mounts easily to the shoulder, and the 28" barrel swings very easily and smoothly.  The trigger pull is fairly light (ahh, those were the days when guns were designed by shooters, not lawyers), and there is no slop in it either.  I had no problems slapping it as I was swinging through the clays.  I was very pleased with the gun's performance (my own performance, however, is a different matter altogether).

Now, you may be asking yourself, "I thought you said there were going to be pictures."  I am coming to that.  One of the only issues I have had with this gun is finding out how to clean it.  Anyone who has had a gas-operated firearm knows that in order to keep the gun functioning properly, one must keep the gas system clean.  Now, for the life of me, I could not figure out how to remove the gas piston so that I could clean it.  So, naturally, I hit the internet to find out how to do so.  And much to my chagrin, I could find no information at all on this shotgun.  Oh, there are plenty of people out there who are more than willing to sell you a copy of an owner's manual, or a copy of a schematic, or a copy of two pages from an American Rifleman magazine from 1961 that shows how to take down the 878 (for a mere $4.98 + $3.00 shipping, I might add).  This just burns me up.  But, based on the condition of the outside of this gun when I got it, I was naturally concerned about the inside of it as well, so I broke down and bought a Remington Arms Factory Gunsmith Service Manual for the 878 (turns out it was a copy, as well) for a measly $11.25, shipping included.

Now, we live in an age where information is power.  And I just spent eleven bucks in order to get some information that should be available for free (granted, Remington is sending me the owner's manual for free, so kudos to them...  it is service like this that keeps me coming back to them).  So I am going to post a series of photographs showing you how to disassemble the model 878 to remove the gas piston for cleaning, so hopefully no one will have to pay outrageous prices for photocopies of gun manuals again.  (It should go without saying that if you the reader are not confident in your ability to disassemble and reassemble any firearm properly, you should seek the assistance of a trained professional.  If you choose to continue, you alone are solely responsible for any mishaps, including injury or death, that you might experience as a result of failing to properly reassemble your firearm.  In other words, I assume no responsibility for your mistakes.)

First, here is the 878:


Before working on any firearm, check to make sure it is unloaded...  then check again.

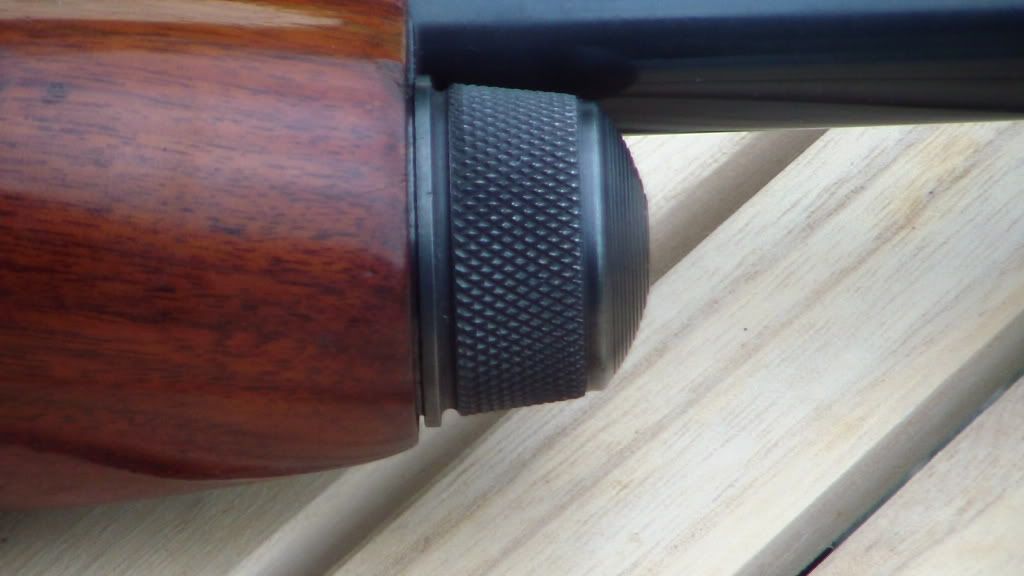
Now, first, remove the magazine cap by unscrewing it.


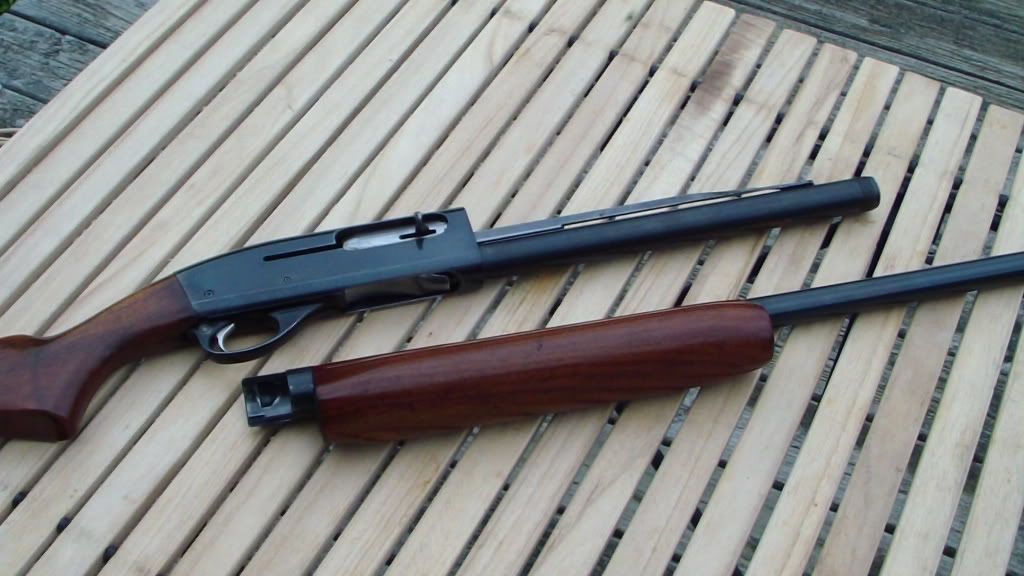
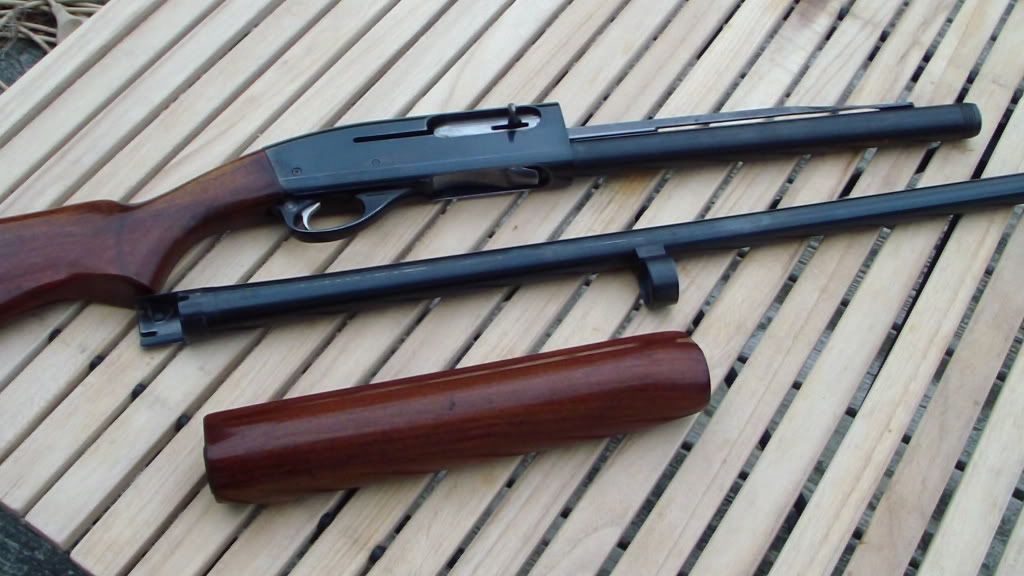
Once the cap has been removed, the barrel and forearm may be removed by sliding it forward out of the receiver.


Now, the forearm may be removed from the barrel by sliding it off of the barrel ring.

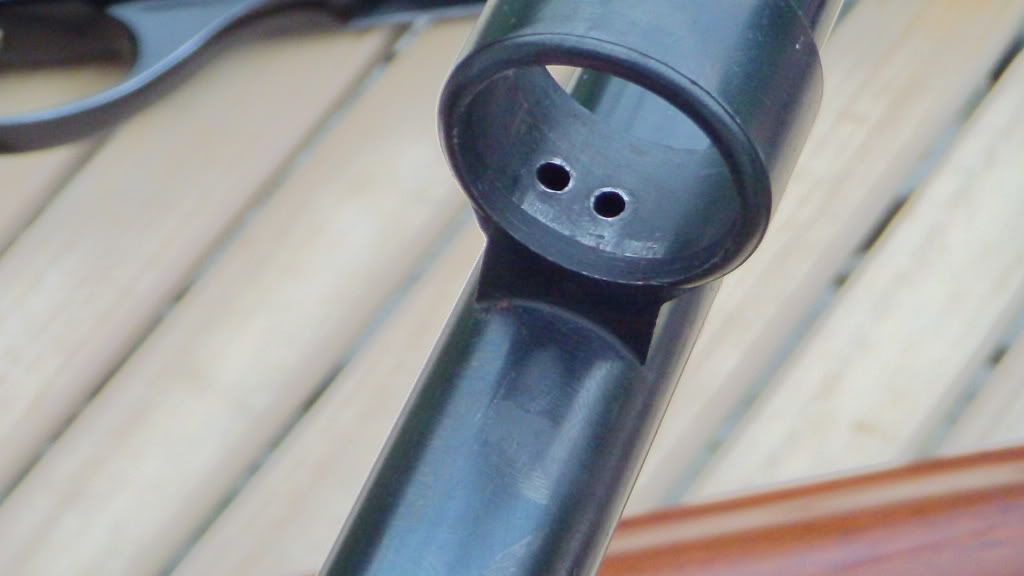
Here are the twin gas ports inside the barrel ring.  You need to make sure that these are clean and free from obstructions.

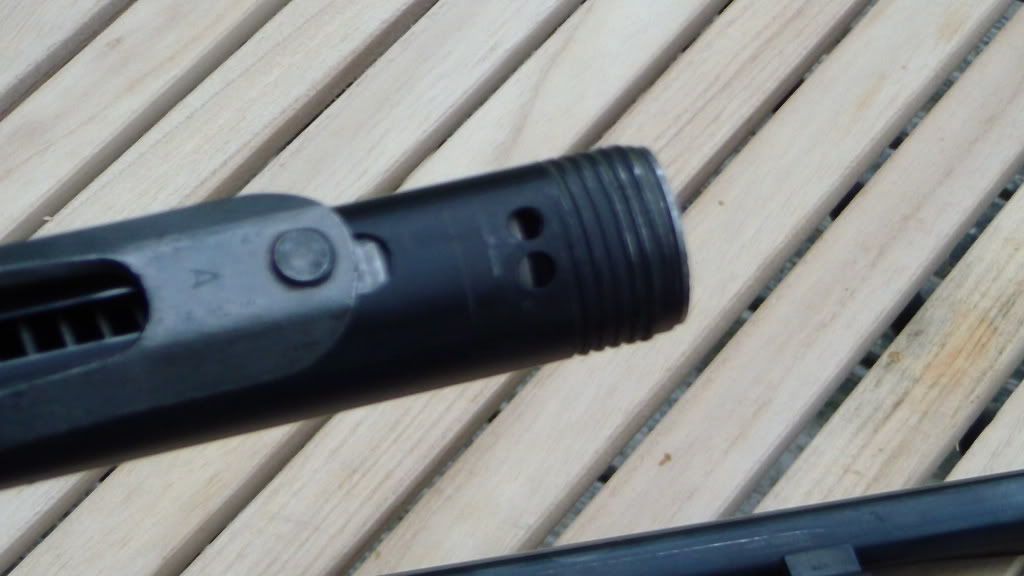
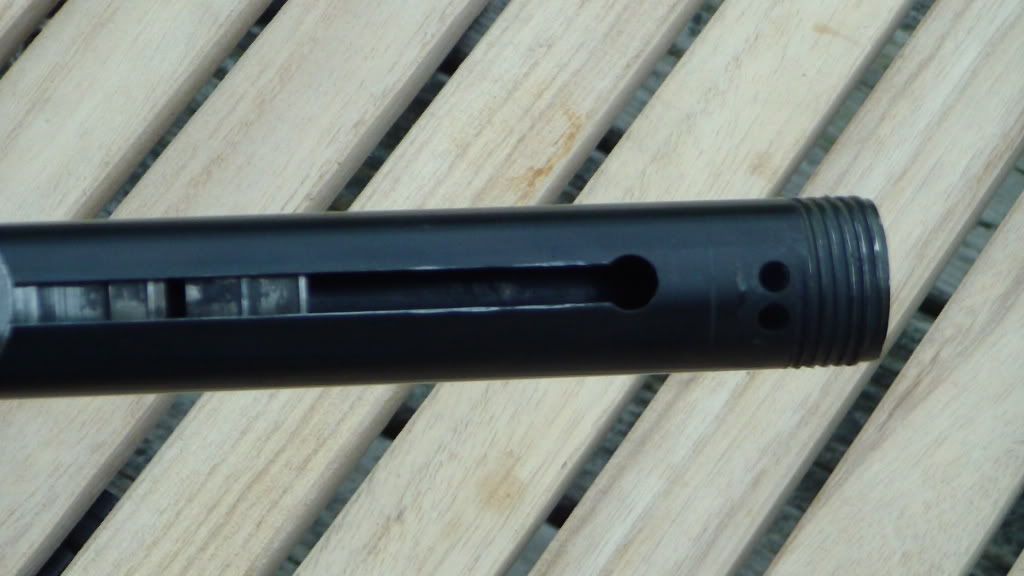
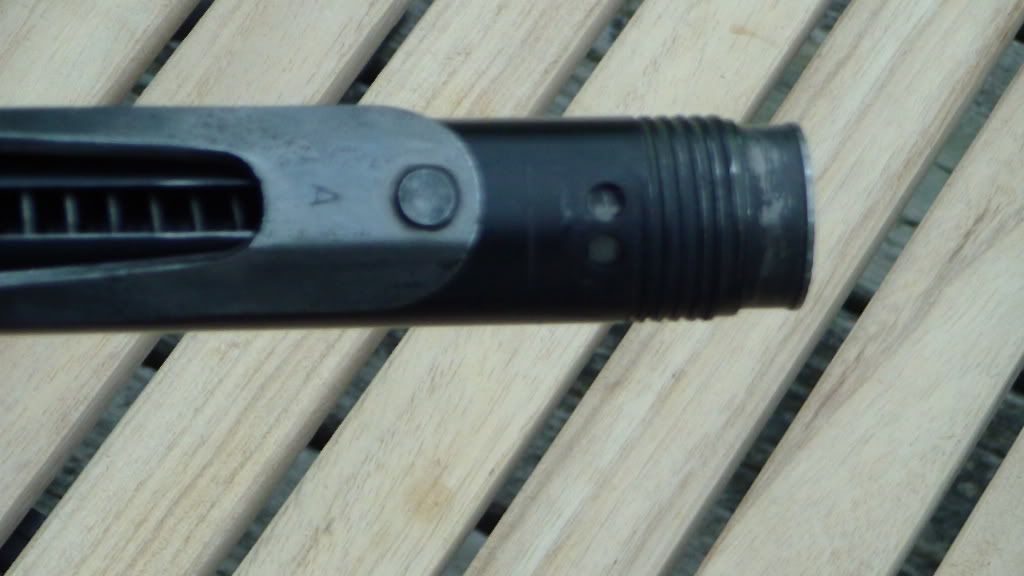
Here are the corresponding ports on the magazine cylinder.  Again, make sure to clean them out.  Also visible, the action bar on the outside of the cylinder, which is connected to the piston assembly inside the cylinder.

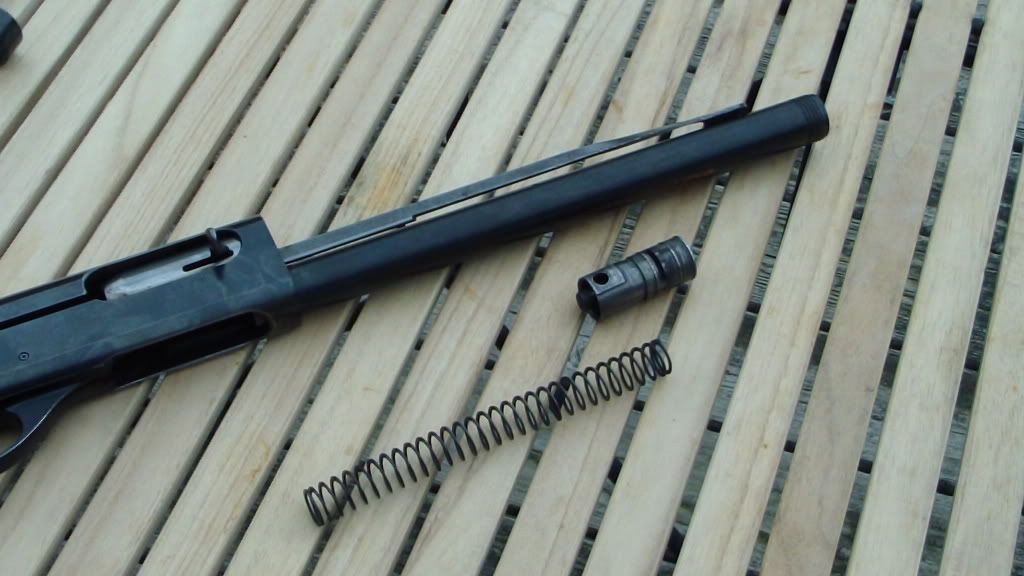
Here, I have opened the bolt, which pulls back the action bar and piston, to show the removal notch at the end of the action bar slot.  Note:  The bolt must be closed in order to proceed with take down -- I have only opened it here for clarity.  In order to remove the piston, the action bar must be released, allowing it to slide forward to that notch where it can be separated from the piston assembly.

Here is a shot of the action bar, showing the retaining stud which connects the action bar to the piston.  When the action bar is all the way forward to the removal notch, the front of the action bar is lifted up, removing the retaining stud from the piston assembly, freeing it for removal.

Now, to free up the action bar, first make sure the bolt is closed.  Next, you will reach into the receiver through the loading hatch on the bottom, and press in on the left side shell latch.  It is a flat bar located just inside the receiver, inside a groove against the side of the receiver.  Press the latch in against the side of the receiver, and you will feel it release, and hear a "click," after which the action bar may be slid freely forward to the removal notch.

Here, the action bar has been slid forward to the removal notch.  You can see the tip of the piston sticking out of the end of the cylinder at this point.

Holding onto the piston, lift up on the action bar to pull the retaining stud out of its slot in the piston assembly. Note:  The piston assembly is under pressure from the return spring!  Make sure you retain control of the piston or it might be ejected violently from the cylinder, resulting in injury or property damage.


The piston assembly and return spring may then be removed from the cylinder.  The retaining stud slot is now visible as a round hole on top of the piston.

The return spring may also be removed from the piston by sliding it out of the end of the piston.

The piston, spring, and cylinder may now be cleaned.  A note on the bottom of the cylinder says that solvents and oil should not be used on the piston or the inside of the cylinder.  How one is supposed to clean these parts without solvent, or protect from rust without oil, is a mystery to me.  I just used a brass brush to knock the caked powder residue out of the cylinder and off of the spring and piston, wiped them off as best I could using a clean cloth, gave it a little shot of Rem DriLube (teflon), and called it good.

To reassemble, simply put the piston and spring back into the cylinder, push in on the piston until the slot and retaining stud are aligned, then push the stud into the slot reconnecting the action bar to the piston.  Open the bolt, which will pull the action bar back, along with the piston, and the shell latch will return to its normal position.  Slide the forearm back onto the barrel.  While the bolt is still open, slide the barrel and forearm back into place making sure the barrel is fully seated into the receiver, then screw the magazine cap back on.  Release the bolt by pressing in on the magazine follower.  And you are done.  It is not difficult at all once you know how to do it.  When I get around to removing the bolt, I will post pictures of that process, as well.

All-in-all, I am happy that I was able to get this particular gun, as much because of its significance as a piece of firearms history, as because of its fine handling and performance.  I think it will make a fine skeet gun, as well as for doves and upland fowl.  So for those of you who are looking for a good autoloader for such applications, you might consider a good used Remington 878 Automaster...  if you can find one.

Monday, April 18, 2011

Gun Review: Hi-Point 995 9mm Carbine

For this installment of Shooting from the Hip, I decided to do a review of the Hi-Point 995 9mm Carbine.  Now, before I get too far, you should know a few things about me and this blog.  When it comes to firearms and their reliability and function, I am not going to take someone else's word for it.  I will not make a decision on a firearm until I have had personal experience with it.  If it works as it should, I will share that information with you.  If it fails to function as it should, I will share that with you as well.  This blog is not sponsored by anyone, and I am not beholden to anyone.  


That said, you should know that one thing I cannot abide is gun-snobbery.  Especially when it comes from someone who has never owned or used the firearm they are detracting.  I do not need someone telling me that a firearm is "junk" who has no basis for their assertions.  Granted, there are cheap firearms out there.  But there is a difference between a cheap firearm and an inexpensive firearm.  And that is the primary purpose of this blog:  to get hands-on experience with many different firearms, and to provide readers with a description of my personal experiences with those firearms.  And hopefully, you will add your own personal experiences in the comments, so that I and others may learn from those experiences as well.  Perhaps together we can separate the wheat from the chaff, as it were.


Hi-Point Firearms are 100% American made, manufactured in Ohio.  The company manufactures semi-automatic pistols in various calibers:  .380 ACP, 9mm, .40 S&W, and .45 ACP.  They also produce semi-automatic carbines in 9mm, .40 S&W, and (finally!) .45 ACP.  All of their firearms come with a lifetime, no questions asked warranty:  if anything goes wrong, send it back to them and they will fix it, guaranteed.  I have owned two of the Hi-Point pistols in the past:  the C9 9mm and the JCP, the .40 S&W.  The C9 currently resides with my father, and I traded the JCP away, primarily as a means of reducing the number of calibers I had to buy ammo for.  Aside from a malfunctioning magazine for the JCP (replaced free of charge by Hi-Point under the warranty), I had never had an issue with either of the pistols.  As of the publication of this blog, I own only the 9mm carbine (model 995).  I would like to add a .45 ACP carbine (4595TS) to my arsenal at some point, especially since I now own a 1911, and can share ammunition between the two.


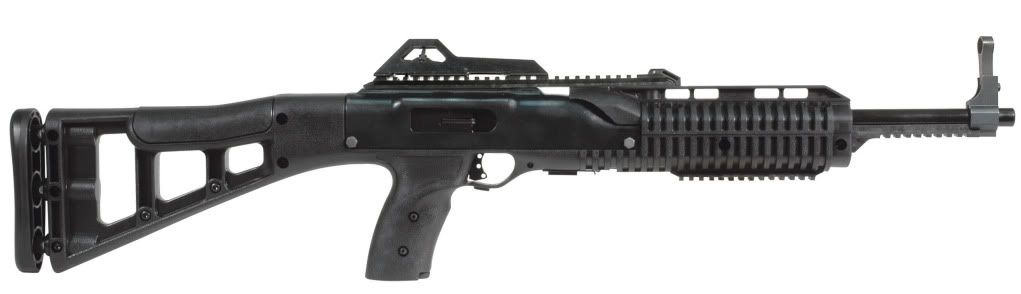
On to the 995 review.  For those of you who are familiar with this particular firearm, you know that it has undergone a face-lift during the past few years.  The new carbine has been given a very tactical profile, as seen here:


(Image courtesy of calguns.net)  This gun has rails, well, everywhere.  More than enough rails to add optics, lasers, vertical foregrips, flashlights, etc.  And all of these are available as accessory packages from Hi-Point.  The buttstock is adjustable for length of pull, as well.  The gun comes stock with a 10-round magazine.  I imagine that this self-imposed limitation is intended to shield Hi-Point carbines from another assault weapon ban, or to allow them to be sold in those States where the Second Amendment takes a backseat to the liberal anti-gun, anti-freedom agenda...  but I digress.  15-round magazines are available from ProMag, but while they are praised by some, they are considered to be problematic by most 995 owners.  Additional factory magazines are available from Hi-Point.  The new 995TS, as it is called, retails for $259 new, although they may be found a little cheaper than that at some gun shops.  When you can find them, that is...  it seems Hi-Point carbines are in very high demand, and a lot of shops are struggling to fill the orders that are flooding in.


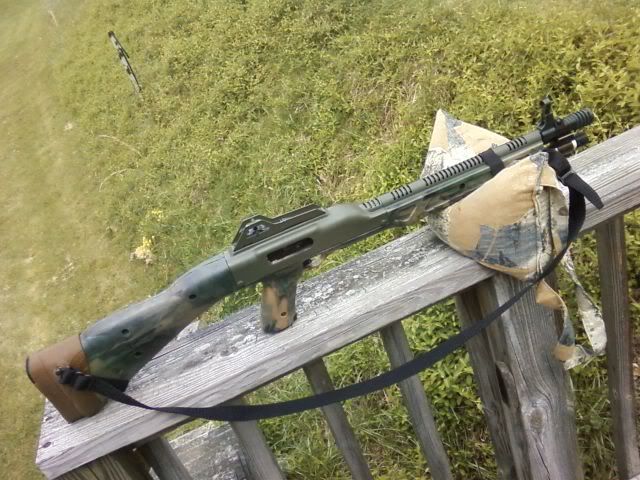
My 995 is one of the older models, with the camouflage stock that is no longer produced.  I did not buy it new:  I bought it used at a local gun shop several years ago.  I do not normally buy used guns, but at the time (some things never change it seems), Hi-Point carbines were hard to find, and the camouflaged versions with the compensator and laser were about as elusive as an albino Sasquatch.  So when I happened to come across this one at an almost-good price ($186 OTD), I jumped on it.  These old carbines have a decidedly odd appearance.  They are often referred to as the "Planet of the Apes" stocks, as they somewhat resemble the rifle that Chuck Heston carries in that movie. 


(Image courtesy of hi-pointfirearms.com)  As Bon Scott says of Rosie, these rifles "ain't exactly pretty."  Unlike the carbine pictured, mine has had an olive drab coating added to the receiver and the heat shield, giving it a somewhat different look.  It also has the compensator and laser attached (by the way, I love how the laser has a warning label on it that says "Laser Radiation:  Avoid Direct Eye Exposure"...  I think I would be a little more worried about the muzzle of that rifle pointing at my head than the laser, but hey, that's just me).  Since the original camo stock is not adjustable for LOP, I added a slip-on buttpad to make it a little longer.  I also added a carry-strap (sling swivels come standard).  Here is a cell-phone picture of how mine appears:


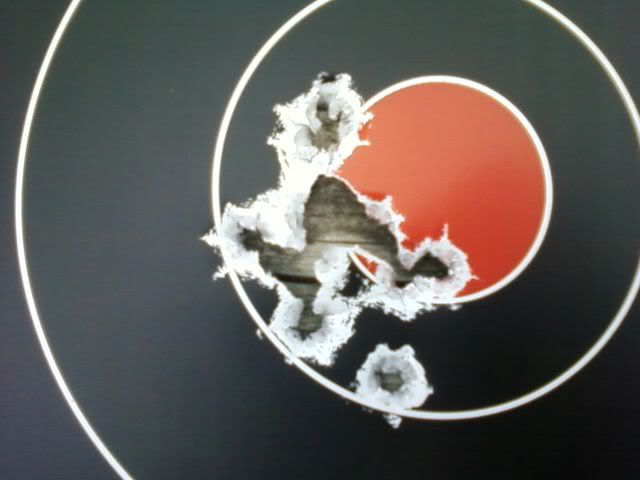
For this review, I set up two Birchwood Casey 8" Dirty Bird targets, one at 30 yards and at 50 yards.  Today, the wind was relatively light, with just an occasional breeze crossing the field of fire.  I brought two10-round factory magazines for my 995, so each target had a full twenty rounds of Winchester White Box 115 grain FMJ fired at it.  I did use a shooting bag to support the fore-end as I shot today, in order to see just how close I could get my groups with the gun.  As you can see from the above photograph, my 995 has open sights (hooded front post and fully adjustable rear "ghost ring" peep sights), and the sun was too bright today to employ the laser.  After twenty rounds, the 30 yard target looked like this:


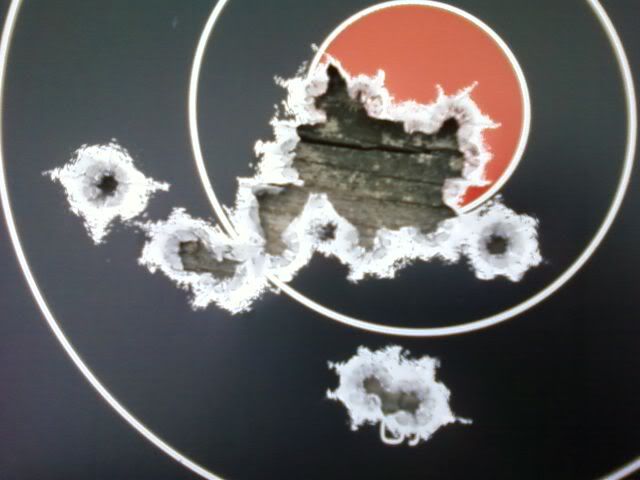
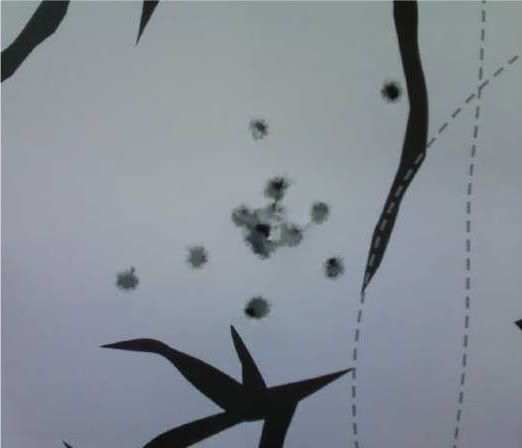
As you can see, there were a few fliers, but those were all on me.  The shot at the top and the shot at the bottom that are outside of the main group were the first shots out of each magazine.  This carbine shot amazingly tight at 30 yards.  Once I settled down and got into a groove, the bullets just kept hitting the same spot over and over again.  So, after taking a pause to reload the magazines and allow the barrel to cool a bit, I trained the sights on the 50 yard target, with the following results:


A somewhat larger spread, but still not bad at all for open sights at 50 yards.  While shooting at this target, I did have a couple of failures to feed, the fourth round in both of my magazines both nosed up in the chamber, which caused me to pause a moment to clear the jam.  I am not sure what caused these failures, as it was the same round (4th) in both magazines.  I will take the mags apart and clean and lube them, and will hopefully get a chance to try them out again soon, and will post an update when I have more data.  The fliers in this group came when changing magazines and after pausing to clear the jams.  Otherwise, all of the other shots clustered pretty well.


I am very pleased with the performance of this carbine.  Recoil is negligible.  The sights are easy to use.  One thing that takes some getting used to is the fact that the charging handle is on the left side of the receiver, rather than the right side where I am used to having it.  I am used to bolt guns with monte carlo stocks where the bolt is worked with the right hand.  The placement of the 995's handle makes sense in that I need not remove my hand from the pistol grip to charge the rifle, but it will take some adjustment on my part.  The plastic stock at first seems a little flimsy, but it is light and easy to handle, and shoulders well.  This gun may be ugly, but there is no denying that as it is designed, it is comfortable to hold and shoot.  I would like to get my hands on one of the new versions to see how well made the new stock is.  I am a bit troubled by the two failures to feed, but I need to try some different ammunitions, as different firearms like different ammos, and the WWB is not known for its tight manufacturing tolerances:  it is economy bulk ammo, after all.


Based on the performance today, as well as the previous outings I have had with this rifle, I can recommend the 995 to anyone who is looking for an inexpensive pistol caliber carbine for plinking, and if I can get the FTF issue resolved, I think it would be a reasonable alternative to a pistol for home defense (especially with the laser).  It would make a great zombie gun too, although the 10-round magazines might diminish that role somewhat.


One last thing:  if you have not tried the Birchwood Casey Dirty Bird targets, give them a try.  I love being able to look out at 50 yards and actually see where my shots are hitting, without having to use a spotting scope!  That is just one less case I have to drag out to the range every time I go shooting.


For more information regarding Hi-Point Firearms and Birchwood Casey:


Hi-Point Marketing and Distribution (MKS Supply)
8611-A N. Dixie Drive
Dayton, OH 45414
Toll Free: 877-425-4867
Fax: 937-454-0503
http://www.hi-pointfirearms.com

Birchwood Casey Dirty Bird Targets
http://sport.birchwoodcasey.com/Targets/TargetDetails.aspx?ProductID=e5ca724c-f8f3-4edb-ba61-4c680535d5b1

Friday, April 15, 2011

Cowboys vs. Zombies: Henry Golden Boy and Zombie Targets

Think of this as a bit of a follow-up of my On the Edge rimfire review of the Henry Golden Boy .22LR lever-action rifle.  Or, think of it simply as me goofing off at the range with my favorite rifle.  Either way, for today's Shooting From the Hip, I decided to take my Henry out to see how it would match up against that iconic denizen of B horror flicks:  the zombie!

Recently, on a trip to a local gun store, Brackin's Gun Alley (I will try to do a gunshop review soon), I was excited to discover that along with the standard silhouettes, bullseyes, and Dirty Bird splatter targets, Brackin's also had some of the Zombie Targets in stock.  Now, I love zombies --  zombie movies, zombie books, zombie t.v. shows, zombie video games.  As I said in a previous post, I am a nerd, and zombiephilia is one of my many nerdy traits.  So, needless to say, I did not leave the Gun Alley empty-handed:  I picked up five of the zombie targets, the Zombie Osama targets, to be exact (I also picked up a Zombie Hunting License).


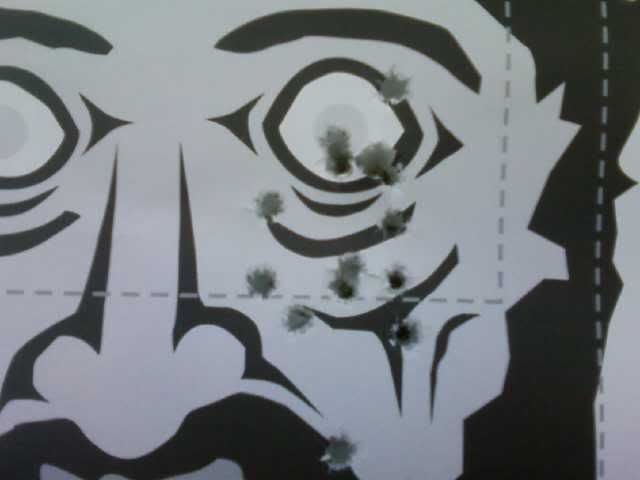
(Image courtesy of zombietargets.net)  So, today, after spending the better part of the day digging up a portion of my yard in order to fix a broken drain line (courtesy of a drunk driver barely missing my house, by the way), I decided to try out one of the targets and redirect some of my frustration in a positive manner.  Grabbing a target, I also picked up my Henry, a bulk box of Remington Golden Bullets, and headed to the range.  It has been a very blustery day in East Tennessee today, and Zombie Osama was not terribly keen on staying put on my target stand, but that added a bit of realism to my shooting, since his head was bobbing and weaving in the stiff (20 - 30 MPH, with gusts up to 60MPH at times) breeze.  My target stand was actually blown over a couple of times.  Nevertheless, I persevered...  and had a great time, too.  These shots were at 50 yards, using the iron sights.  My first 15 shots were, of course, to Zombie Osama's head...  his left eye, to be precise.


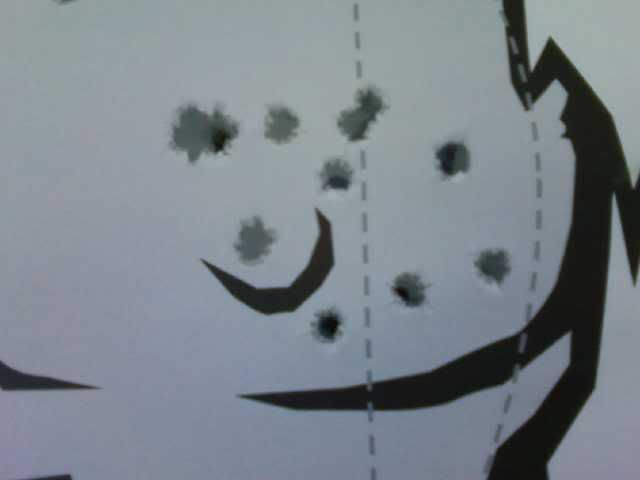
My second set of 12 rounds (more on this later) went to his chest, right around his left nipple.


The next 15 rounds went to his right chest region.


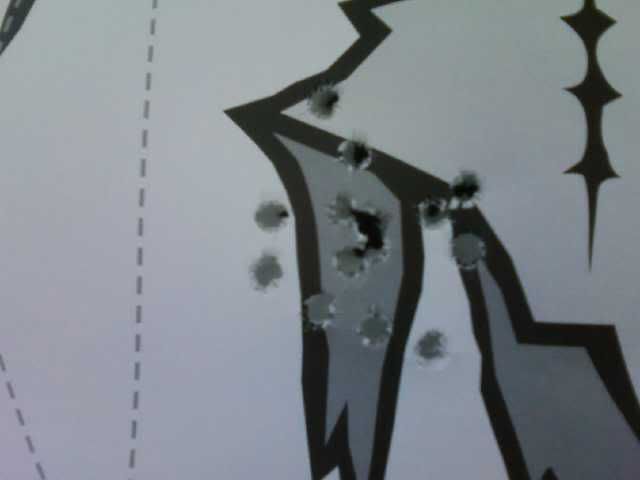
And finally, to his right shoulder / underarm area.


As you can see, none of these groups are extremely tight, but with the wind blowing as hard as it was, and the target moving around, I thought the rifle did extremely well.  After my initial frustration at the wind, I actually began to enjoy the added difficulty of shooting the moving target.  The second set of shots I fired, I had three misfires, which I have to say is unusual, since I rarely have misfires with the Remington Golden Bullets (Thunderbolts are a completely different story, however).  All three casings exhibited deep firing pin marks in the rim, so I know it was not an issue with the rifle.  There were no other issues at all during this shooting session.

The more I shoot my Henry, the better I like it.  The action continues to be exceptionally smooth.  The positive ejection of spent casings is remarkable:  it tosses the empties about seven to eight feet to the right.  And I am getting more used to the buckhorn sights.  I believe with more practice, I will become much more proficient with the rifle, and then perhaps my shooting will do this fine rifle the justice that it is due.  And when the living dead start roaming the earth, I will feel quite safe knowing I have my Golden Boy close at hand.

For more information, or to order your own Zombie Targets (they also offer the Zombie Hunting Permit, as well as stickers and t-shirts), please visit their website.  Shooting paper is fun, but shooting Zombies is awesome!!!

Zombie Targets
770-624-4185
http://www.zombietargets.net/