Search This Blog

Showing posts with label opinion. Show all posts

Monday, January 13, 2014

Gun Review: North American Arms Mini Magnum Revolver .22 WMR

As more and more citizens take advantage of their 2nd Amendment right to bear arms, specifically with respect to concealed carry, it seems that nearly every firearm manufacturer is racing to produce ever smaller pistols to fill this niche.  The names we have traditionally associated with compact pistols, such as Kel-Tec, Rohrbaugh, and Seecamp, have been joined by a host of others, some new, some old:  Ruger, Smith & Wesson, Kahr, Diamondback, and Taurus, just to name a few.  But one company has been producing "pocket pistols" of the highest quality for about forty years, and continue to do so today:  North American Arms.  NAA has a large selection of firearms, from pocket sized semi-automatics to what may be the "definitive" NAA product, the Mini-Revolver, in .22 Short, .22 LR, and .22WMR (aka ".22 Magnum").  Today, I will be looking at the NAA Mini Magnum, a five-shot mini revolver in .22 Magnum, which I purchased from my friends at Tri Cities Gun Depot.

Image courtesy of northamericanarms.com

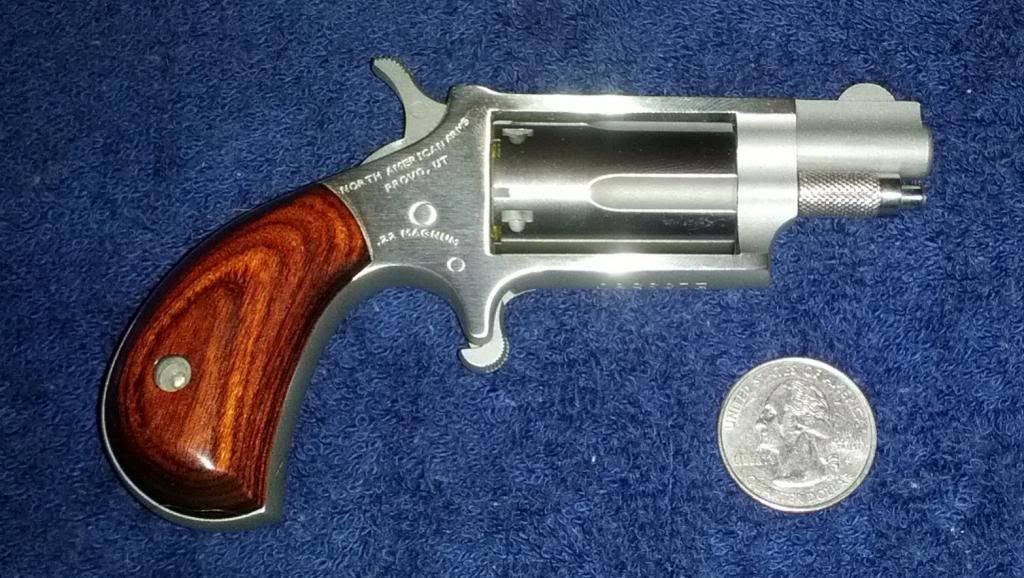
The North American Arms Mini Magnum is a palm-sized, five-shot, single-action revolver.  The revolver frame is milled from a solid billet of stainless steel.  This particular model is available with either a 1 1/8" or a 1 5/8" barrel, either ported or non-ported.  There are also different grip options available, including standard rosewood, imitation mother-of-pearl (black, white, or pink), as well as a folding holster grip which covers the trigger when folded and has a handy clip to keep the gun properly aligned while in your pocket.

Image courtesy of northamericanarms.com

These guns are extremely well-made.  Everything on the revolver - from the frame, to the cylinder, to the grips - everything is tight, polished, and well-fitted.  No machine marks to be seen.  The trigger is fantastic and the cylinder lock-up is rock solid. My Mini Magnum is truly one of the best looking firearms I have ever owned.  And just in case something does fail, NAA offers a lifetime warranty to the original registered owner.

The model I have is the 1 1/8" non-ported barrel with rosewood grips.  The revolver is 4 3/4" long, 2 7/8" high, 7/8" thick, and weighs in at a whopping 5.9 oz empty.  It completely disappears in my front pocket (I made a pocket holster out of leather in order to keep the gun properly indexed while in my pocket, as well as to help keep lint from clogging up the works).  This really is a gun you can take with you anywhere, regardless of what you are wearing.

Pocket-sized personal protection

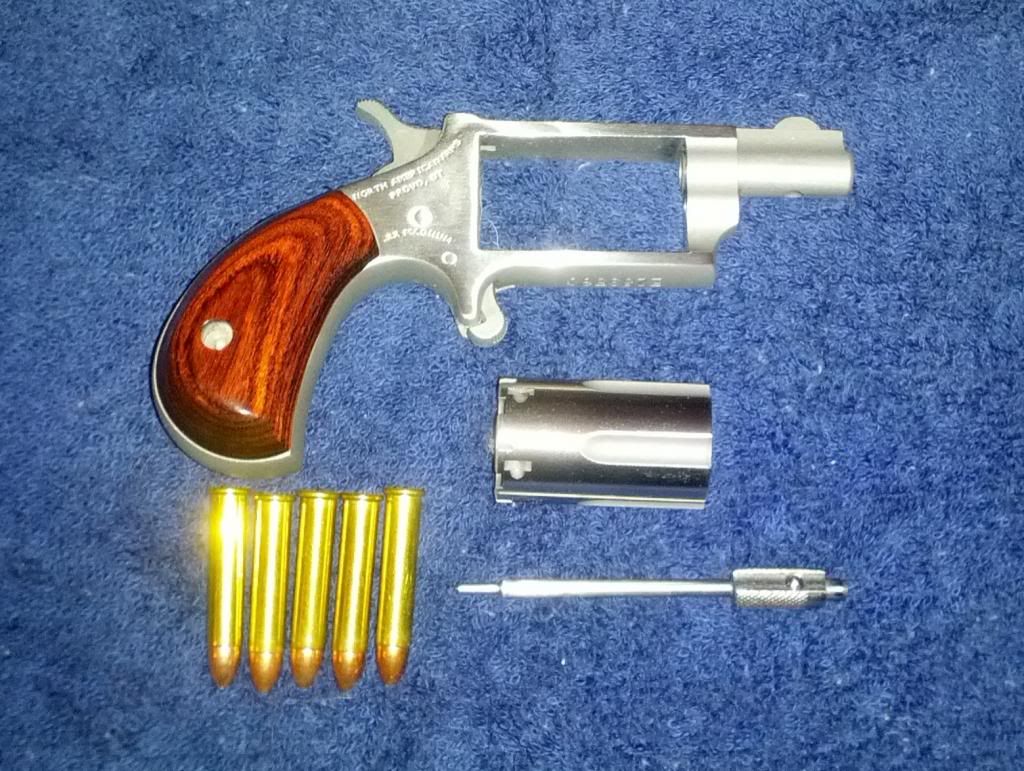
The Mini Magnum's cylinder must be removed in order to load and unload the firearm.  This is accomplished by pushing in a button on the end of the cylinder pin, then pulling the pin out of the front of the firearm.  Placing the firearm on half-cock, the cylinder may then be swung out for loading.  In unloading, the cylinder pin may be used to push out stubborn empty cases.  Once the cartridges are loaded, the cylinder is then replaced into the frame, the cylinder pin is replaced, and the gun is ready to fire.  Reloading this gun does take some time, and is not something that one would want to undertake in the heat of the moment.  You have five rounds:  make them count.

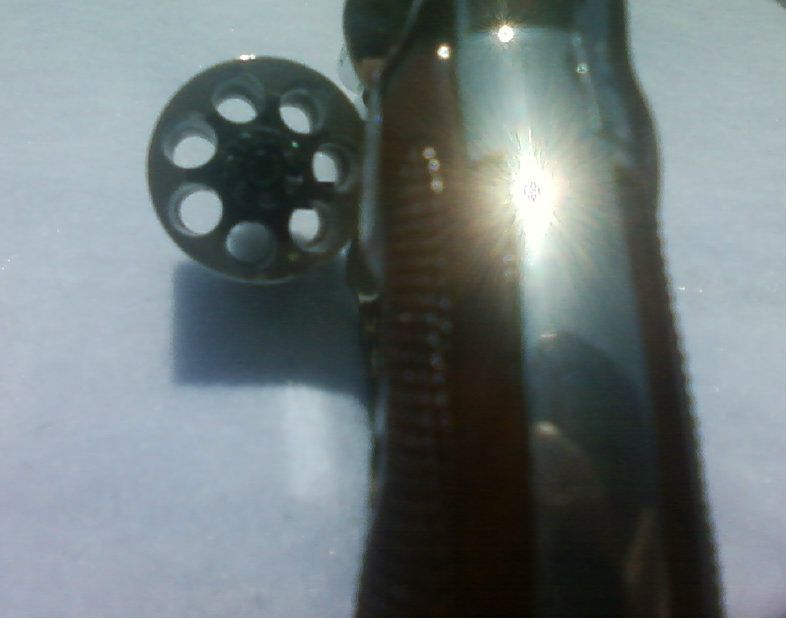
Shown with cylinder removed for loading.

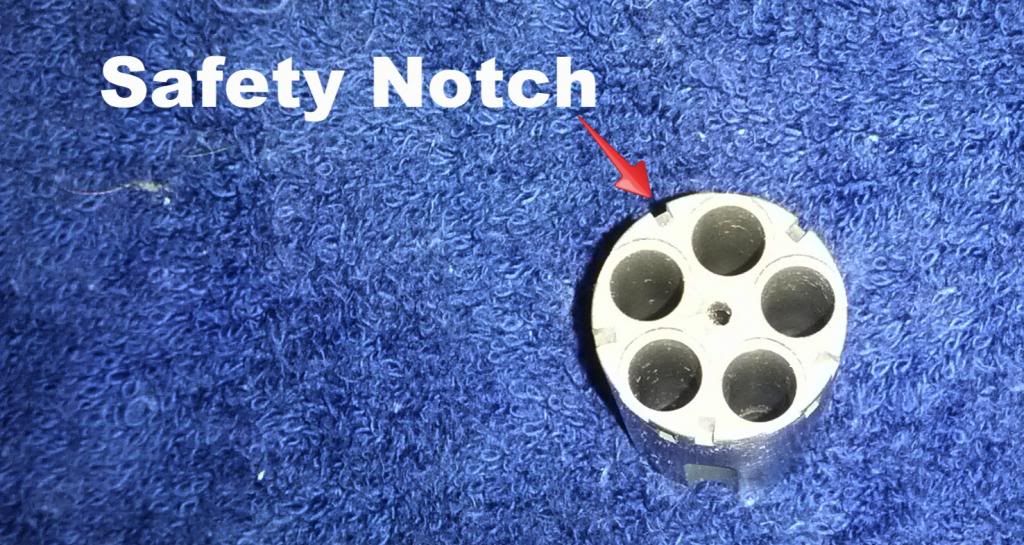
Since the revolver does not have a hammer-block safety, one would normally only load four of the five chambers, so that the hammer may be rested on an empty chamber to alleviate the chance of accidental discharge.  North American Arms has developed an ingenious work-around for this, however.  Between each chamber, there is a shallow safety notch, in which the hammer may be rested, thus allowing the weapon to be carried fully loaded.

Cylinder removed, showing safety notch
 (and powder residue in the chambers)

Shooting the NAA Mini takes some getting used to.  For one thing, the grip is very small.  I can only get three fingers on the grip, with my pinky curled under it.  Also, the gun is single-action, requiring the hammer to be manually cocked before each shot.  I have found that I obtain the best results by using a two-handed grip, with my support-hand wrapped around my shooting hand, and using my support-hand thumb to cock the hammer, thus eliminating the need to change my grip with each shot.  The .22 Magnum, while a rimfire cartridge, is a powerful round.  Firing one out of a gun not much bigger than a Zippo lighter is, well...  exciting.  There is no painful recoil, but the entire gun tends to rotate barrel upward in your hand when it is fired.  With practice, one can learn how to control this tendency, however.  One thing I would stress is that hearing protection is a must when practicing with these revolvers:  the .22 Magnum absolutely roars out of this tiny little gun.

The NAA Mini is every bit as accurate as a revolver with a 1 1/8" barrel can be, once you learn how to shoot it.  I have found that using the front sight to aim results in shots being consistently below the point of aim.  Sighting along the top of the barrel, however, gives much better results.  Shooting slowly at a range of fifteen feet, I am able to get consistent three inch groups.  Rapid point shooting at the same distance, the groups open up, but I can still put all five shots inside of the 8-ring.  With more practice, I think I will be able to shrink that down to the 9-ring.

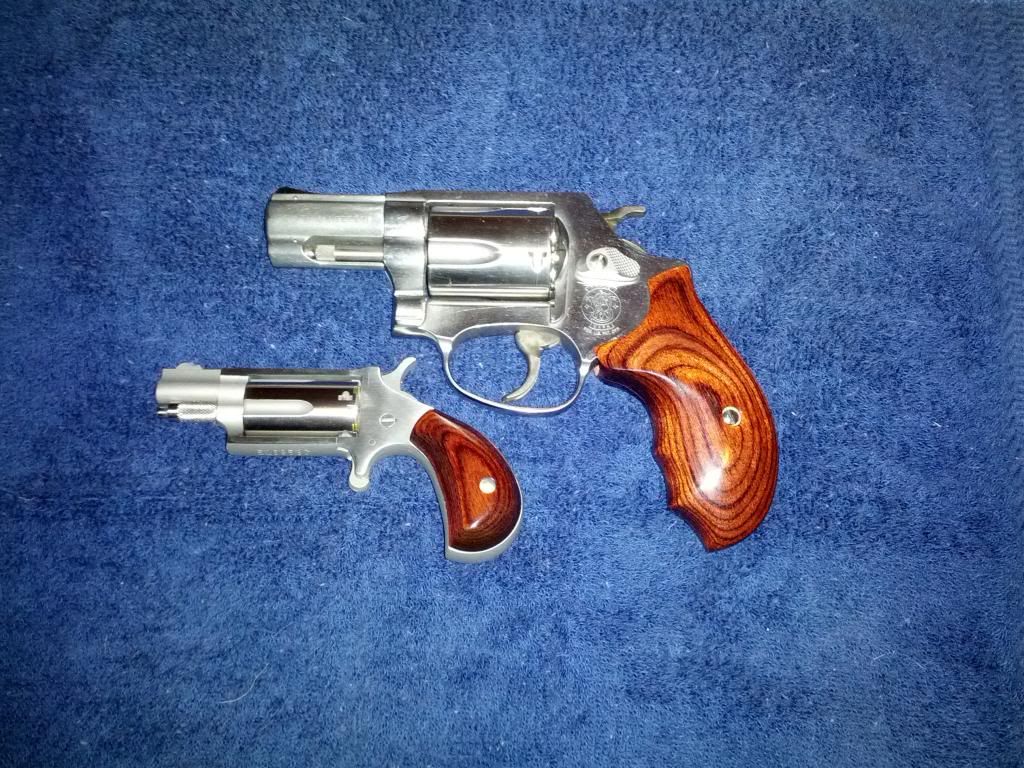
I do not pretend that the .22 Magnum is the best cartridge for self-defense.  However, I do believe that it is a serviceable round, and would certainly be capable of stopping a threat if one knows how to use it.  Nor do I think that a gun with a tiny barrel and rudimentary sights is the best option for a gunfight.  The NAA Mini Magnum is an up-close-and-personal "get off of me" gun...  what some people have called an "E.N.T." gun - short for ear, nose, and throat, meaning that the face, head, and throat would be likely areas to target with this type of weapon.  Thus, I will not be replacing my everyday carry gun with the NAA Mini Magnum.  However, I do believe that the Mini makes a great back-up gun to my S&W Model 60.  And on those occasions when I cannot carry "the Chief," at least I do not have to be completely unarmed.  The NAA Mini just gets popped into my front pocket, and I am ready to go.  In fact, since I purchased "Maggie," I have not left the house without her (so far I have been able to avoid the post office, courtrooms, and airplanes).  The Mini Magnum is one of the best ways to live the mantra:  always carry, never tell.

My (almost) matching pair of magnums:
S&W Model 60 .357 Magnum and NAA Mini Magnum


For more information:

North American Arms

Friday, December 7, 2012

Crossbow Review: SA Sports Fever Magnum Recurve

For this article, I thought we would talk a little archery.  In particular, one itch that I have had for some time, but which I have never gotten around to scratching, is my desire for a crossbow.  I have never owned a crossbow, but I have been fascinated with them for a long time.  So I decided I would finally add one to my arsenal, if I could find a good deal.  Enter Black Friday 2012, a "doorbuster" sale, and a half-price SA Sports Fever Magnum recurve crossbow.

The SA Sports crossbows are marketed by SA Sports, LLC, out of Allentown, PA.  It is my understanding from reading several posts on internet forums that these particular crossbows are of Taiwanese manufacture (if I am mistaken and anyone can provide information on the actual country of origin, then by all means please set me straight.)  The company website ( http://www.sa-sports.com ), while not a fount of information, nor exceedingly easy to navigate, lists a few different crossbows (three compound and two recurves), youth bows, a bowfishing outfit, as well as accessories (strings, cables, arrows, rangefinders, etc.).  The particular crossbow I chose was the Fever Magnum, a recurve design boasting a 175 lb. draw weight and an advertised maximum velocity of 240 fps.  I chose the Fever Magnum for two reasons:  first, the price (a holiday doorbuster sale price of $149.95); and second, it is a recurve, not a compound, so replacing a broken string will not require a bow press (just a strong back).

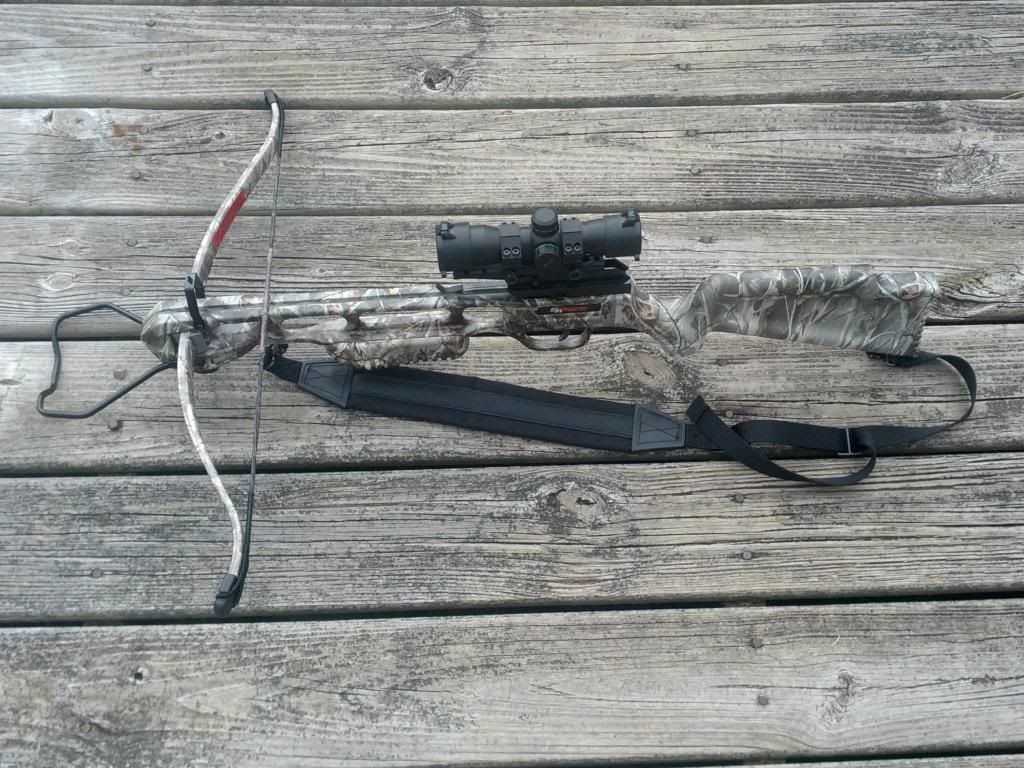
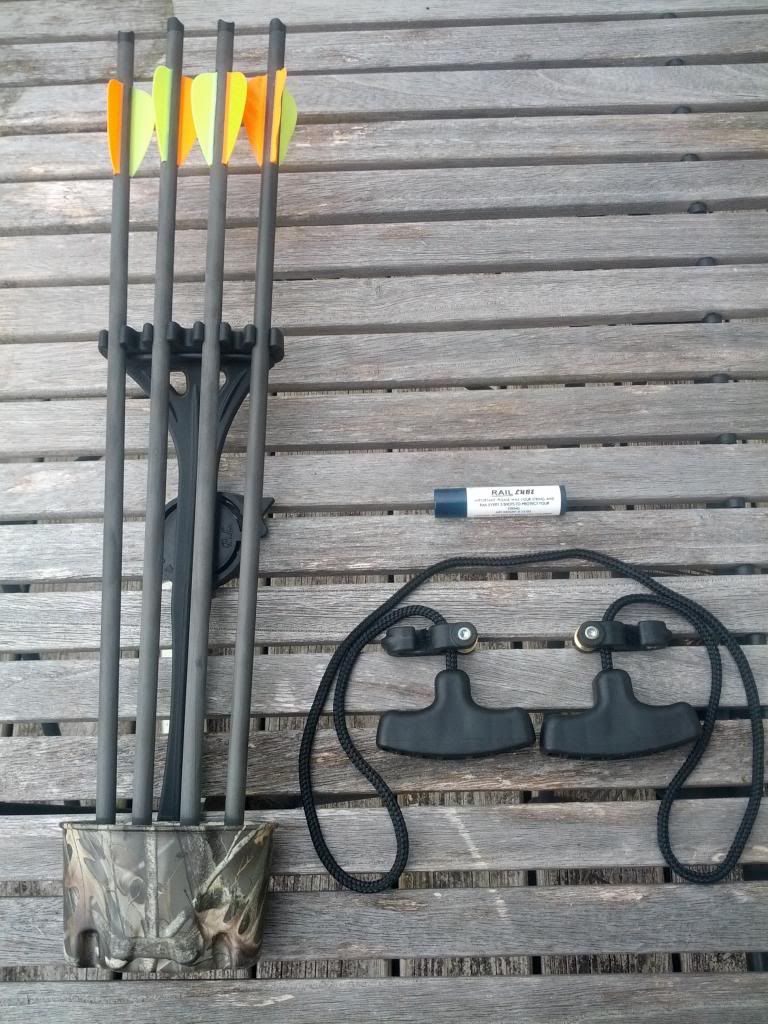
The crossbow came disassembled in a cardboard box.  Included were the crossbow itself, consisting of the pre-assembled stock/rail (lightweight composite stock and aluminum arrow rail), weaver-style scope rail, the limb (made of compression fiberglass), limb tips (2), string, limb spacers (two plastic and one metal), foot stirrup, open sights (installation optional), as well as the necessary mounting hardware and Allen keys.  Also included were a padded sling with swivels, a 4x32 scope with dual color illuminated multi-reticle, quick detach quiver, bow stringer cable, rope cocking device, a tube of rail lube, and four 16" arrows with field tips.  The included instructions were what I have come to expect from equipment manufactured overseas, so (thankfully) SA Sports has very thoughtfully provided an assembly video on YouTube which made assembly a much easier task, taking less than an hour altogether.  Assembled, the crossbow is about 36" long (with foot stirrup), and 27" wide from limb tip to limb tip.  It weighs close to 5 pounds with the scope, a little over 5 with the scope and sling.  The crossbow is also equipped with an ambidextrous safety that is automatically engaged every time the bow is cocked.

SA Sports Fever Magnum Crossbow


Accessories include quiver, 4 arrows, rail lube,
and rope cocking device

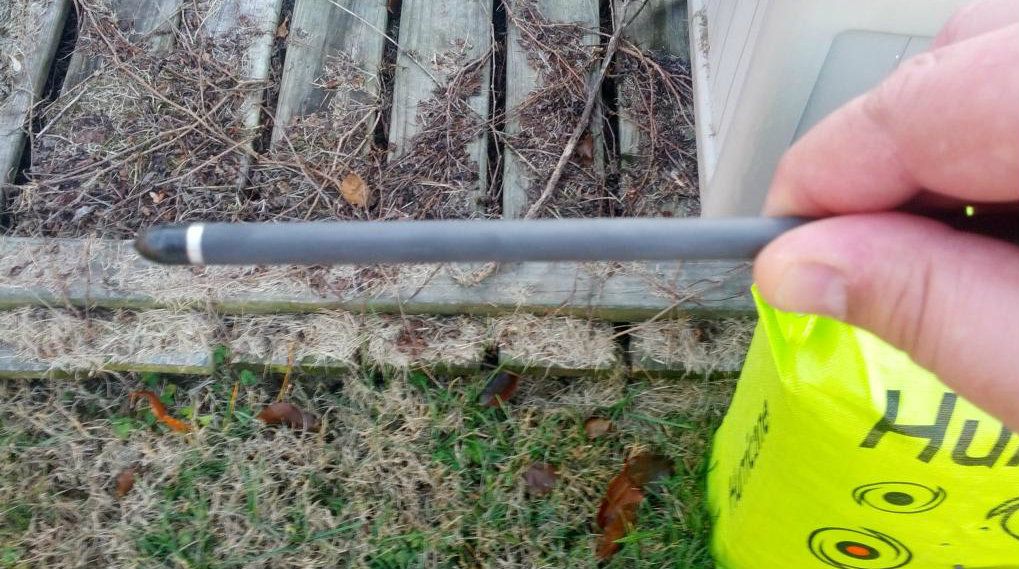
Field Tip on included arrow
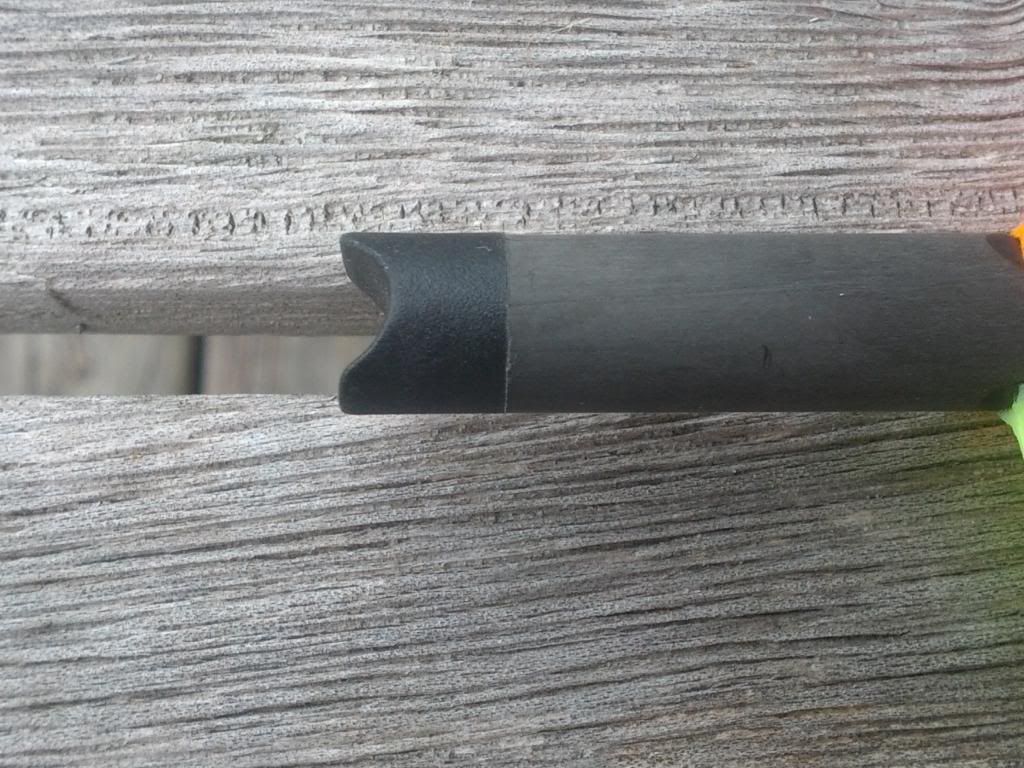
Half-Moon nock on included arrow

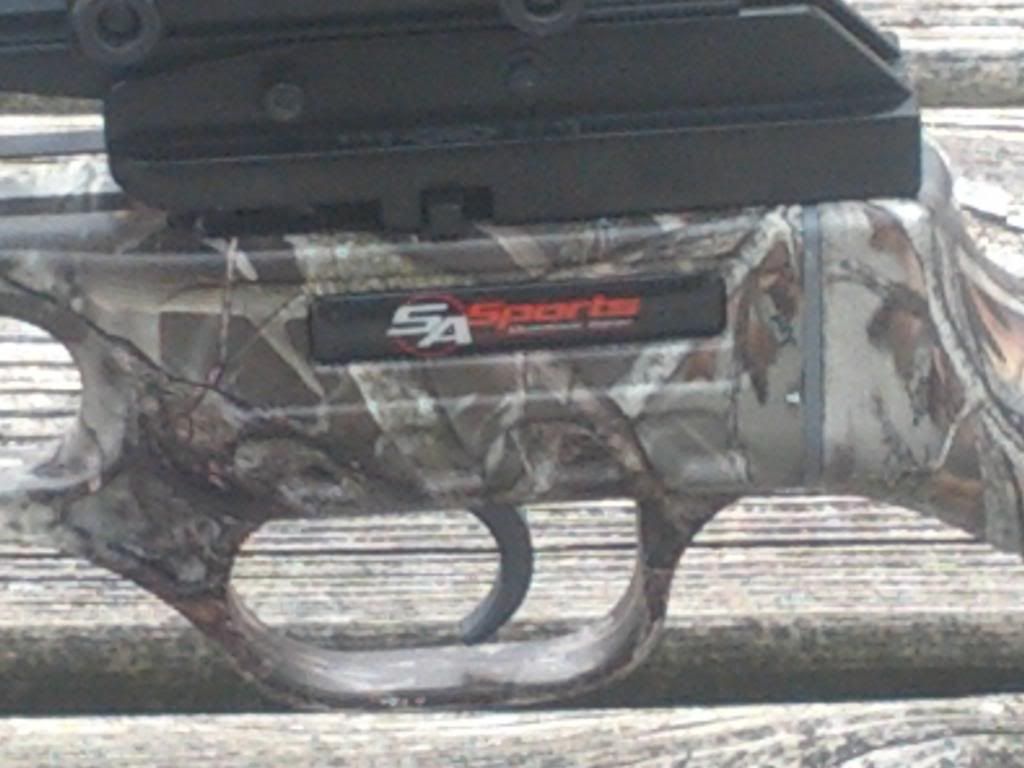
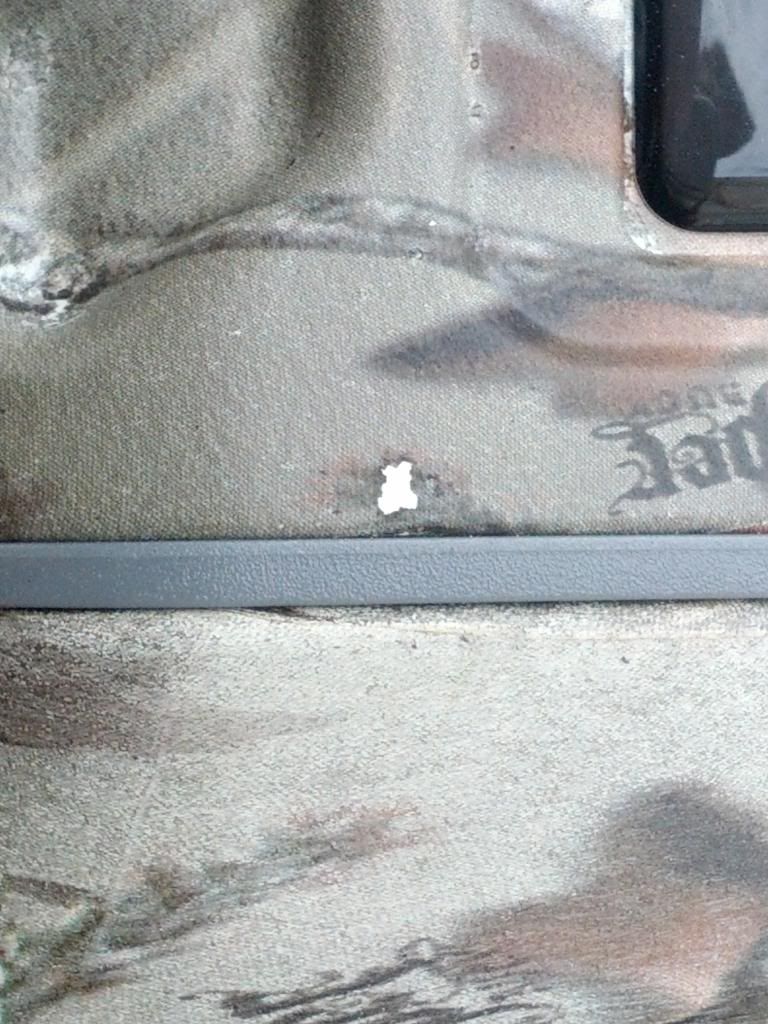
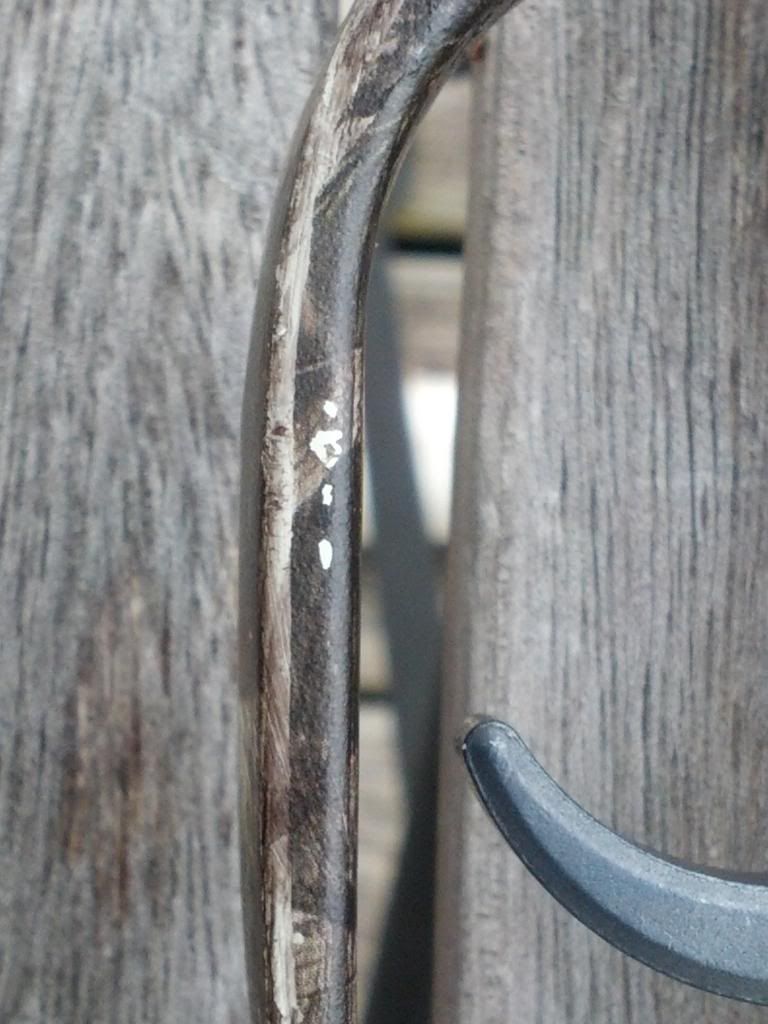
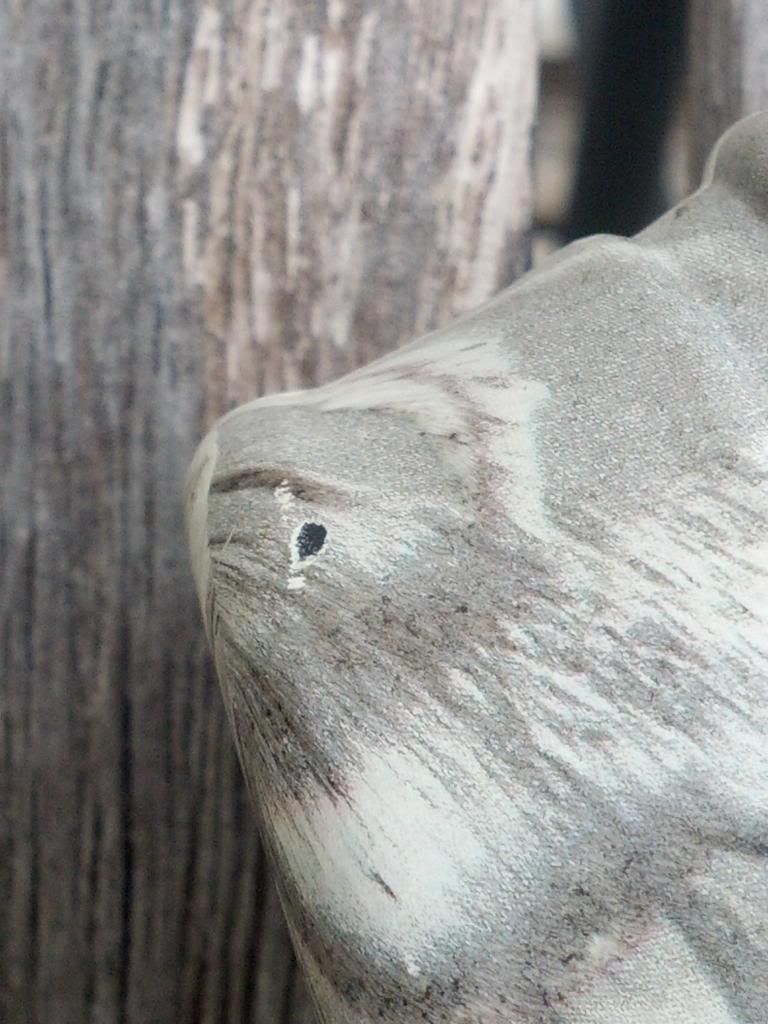
First impressions:  the crossbow appears to be well-made.  It does not feel cheap, like it is going to fly apart at any moment.  Despite the heavy weight of draw, the rope cocking device maximizes your leverage, seeming to cut the weight in half, making it relatively easy to cock.  The safety engages fully and with an audible "click" each time the bow is cocked, and it is easily disengaged from either side.  The trigger is pretty nice.  Better, in fact, than several of my rifles.  There is just the slightest hint of take up, and it breaks cleanly at what I would estimate to be around six or seven pounds.  The Fever Magnum is lightweight, and comfortable to hold, and the palm-swell on the forearm seems to me to be a nice touch (remember to keep those fingertips below the rail, kids!)  As far as negatives, there is the finish.  On my particular bow, there are some cosmetic blemishes in the camo dip:


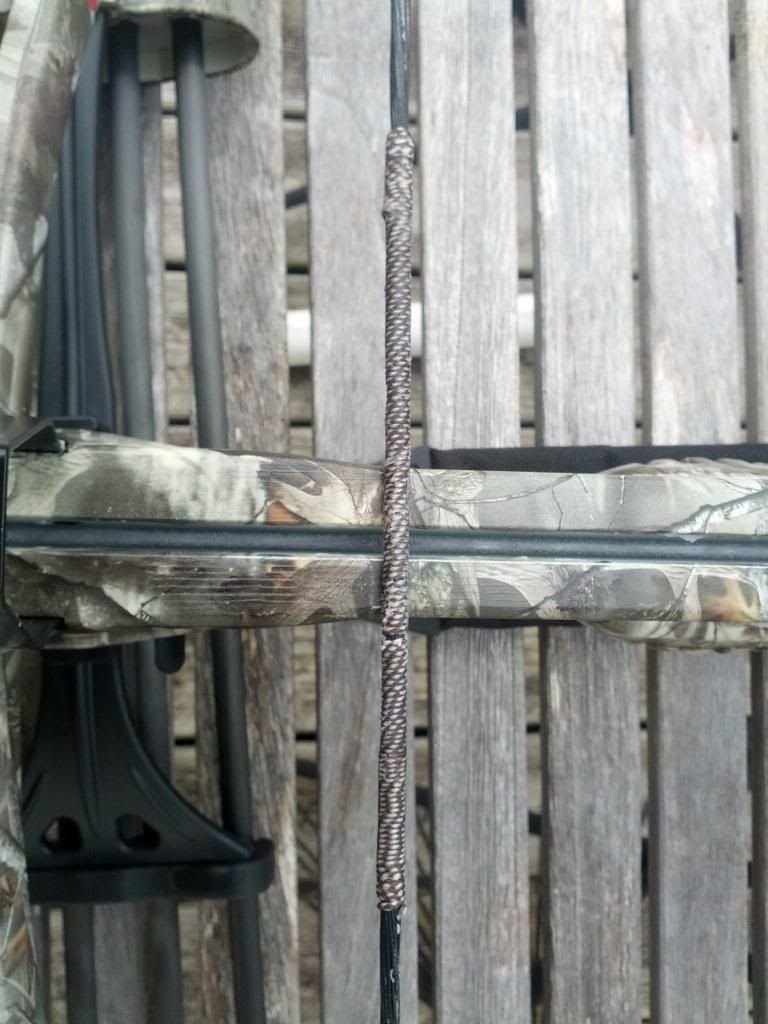
Nothing spectacularly bad, but clearly noticeable.  Also, the serving on the string is not centered:


Again, it is not off by much, and probably will not affect the operation of the bow, but it is just one of those little things that illustrates the difference between a top-shelf item and a serviceable, but lesser quality, item.  This clearly is not an Excalibur, but then, it costs about a third or less than even the cheapest Excalibur.  The quick-release quiver I do not really care for.  It adversely affects the balance of the crossbow, and I do not hold out much hope that the release mechanism will withstand much use, as it is all plastic.  Also, the included arrows are not very exceptional, either.  Serviceable, yes...  but that is about all.  Use the money you save buying this crossbow to get some good arrows.  And probably an extra string or two.

While on the subject of arrows, this gives me an opportunity to discuss customer service.  According to the included literature and the company website, SA Sports recommends using 16" 2219 aluminum arrows or 20" carbon fiber arrows.  And that is the extent of the information given on projectiles.  Now, as many of you know, crossbows can be damaged if they are "dry fired":  that is to say, if you draw back the string and release it without a suitable projectile loaded, the strings and limb can be overstressed and damaged.  Now, the same thing can happen if you use a projectile that does not have enough mass, so you should always make sure that you have a heavy enough arrow so as to fall outside of dry-fire status.  Unable to find the minimum recommended arrow weight, I was a little hesitant to just drop in any old 20' carbon arrow without making sure it would suffice, so I fired off an email to SA Sports asking them what the company recommends.  In less than 30 minutes, I had a reply from Mark Ambrose, the company president, advising me that the minimum weight for this particular bow is 350 grains, and that my chosen arrow (Carbon Express 20" with 100 gr. field point for a total of 425 gr.) was well within the limits.  As you may know from my previous reviews, I really respect companies that back up their products after the sale is over.  These are the businesses that continue to see my patronage time and time again.  So, hats off to Mr. Ambrose.

Multi-Reticle
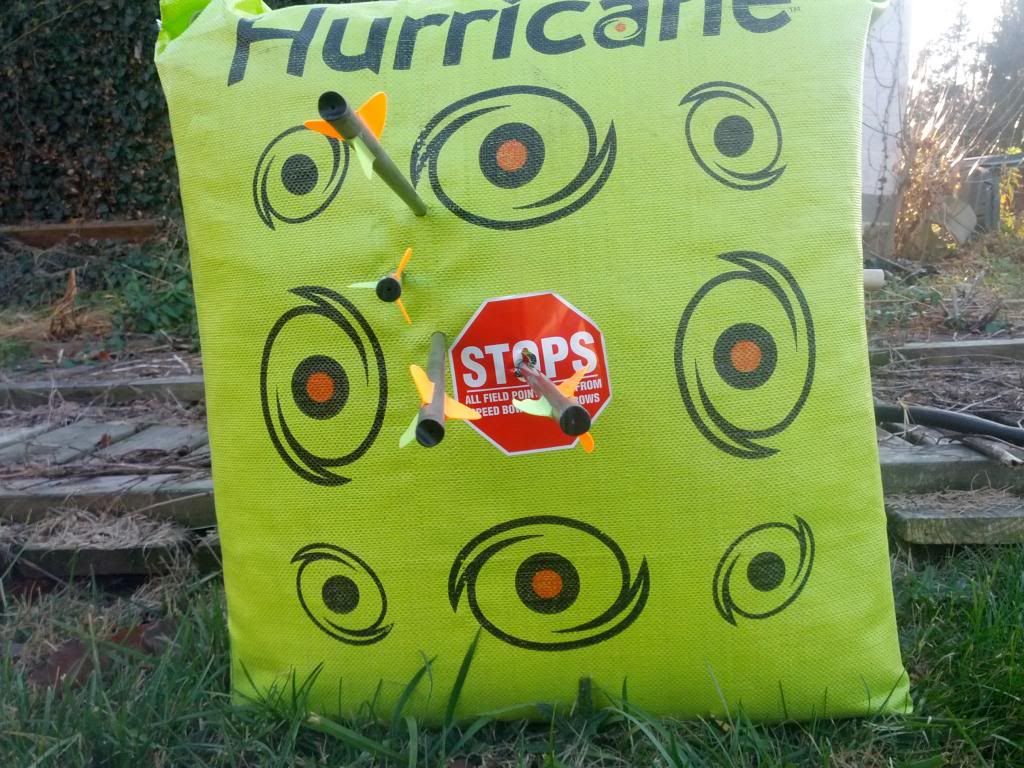
My first outing with the Fever was somewhat of a bust... literally.  Not the crossbow:  no, no, the crossbow did just fine.  Better, in fact, than I had anticipated.  You see, never having shot a crossbow before, I was not sure what to expect in terms of arrow penetration.  So I had gone to my local big box store and picked up an archery target, one made of eight inch thick foam wrapped in heavy gauge plastic sheeting.  Instead of installing the included scope, I chose instead to go with a red/green dot sight I had laying around.  I am just not crazy about the multi-reticle on the provided scope.  I then proceeded to cock the bow using the provided rope cocking device (a Godsend for someone with a bad back), and fired an arrow downrange at the target I positioned 15 yards away.  From the sound, I knew that the arrow had hit the target, but was only barely able to see a dark spot in the upper right of the target (no magnification on the red dot).  So, I reloaded, adjusting the sight a little for elevation, and fired again.  Once more, I knew the arrow hit the target, but could not really see where, so I walked out to the target to check on my accuracy, only to find that the arrows had gone completely through the target!  Luckily, I had placed an old garden hose reel container behind the target to keep it from tipping over backwards from the force of the arrows hitting it.  Not that I should have worried about that, the arrows not only cleared the target, but punched nice big round holes through the side of the heavy plastic reel cabinet.  Just a good reminder to us all:  be sure of your target and what is behind it!

So, after a trip to the local big outdoors retailer, I picked up a Hurricane archery target, guaranteed to stop arrows from high speed bows and crossbows.  After four shots, I had the red dot sighted in, this time with much better success:  the first shot high and left, second a little lower and left, third just left, and fourth center of the bullseye.


These results were with the included 16" arrows.  When I fired the 20" Carbon Express, they shot about three inches lower than the 16" arrows.


Penetration on the heavy Hurricane target was good, too, averaging just over 4.5" on the 16" arrows, and 5.25" on the 20" arrows.  I will set up a bench rest to shoot from, to see just how tight a group the bow is capable of, and post those results soon.  But all in all, I am pleased with the accuracy of this crossbow.

So, the SA Sports Fever Magnum recurve crossbow seems to be a good, solid crossbow for the money.  Especially as a starter bow for someone just getting into crossbow archery.  It is lightweight, has a relatively small footprint for a crossbow, and is simple to operate.  It is a little loud for a bow, but it is also a pleasure to shoot.  Do I think it would be a good bow for hunting?  I will have to spend some more time with the crossbow, to see how the accuracy holds up, and I would like to chronograph it to see just how fast the arrows are moving before I make that kind of decision.  Would I pay the MSRP of $299.95 for it?  Probably not.  But I certainly think it is worth the $149.95 I paid for it.  And one more thing:  I really wish I had not waited so long to get a crossbow...  these things are a lot of fun to shoot!

For More Information:

SA Sports, LLC
1337 N. Nelson Street Unit B
Allentown, PA 18109
Tel: (484) 294-2257
Fax: (484) 270-4699
Email: sales@sa-sports.com

Hurricane Bag Targets
Field Logic, Inc.
101 Main Street
Superior, WI 54880
Tel:  1-800-282-4868
Email:  support@FieldLogic.com

Friday, May 25, 2012

Gun Review: Rossi Model 25 Princess .22LR Revolver

As a gun collector, I am constantly on the lookout for interesting, unusual, and uncommon pieces.  Now, do not get me wrong, I enjoy shooting, and therefor I put a premium on reliability and accuracy, but I also very much am interested in the history of guns as well, and I love firearms that are more than just your run-of-the-mill, everyone-has-one models.  Such as my Remington 878 Automaster, which I covered in a previous post...  it may not be worth a great deal in monetary value, but to me, it is valuable as a piece of Remington history, and thus of firearms history.  The same can be said of my military surplus rifles:  somewhere, sometime, someone trusted his life - and possibly his nation's survival - on these rifles.  Each arsenal repair, each little ding in the wood stocks, is part of a story, and I find that fascinating.
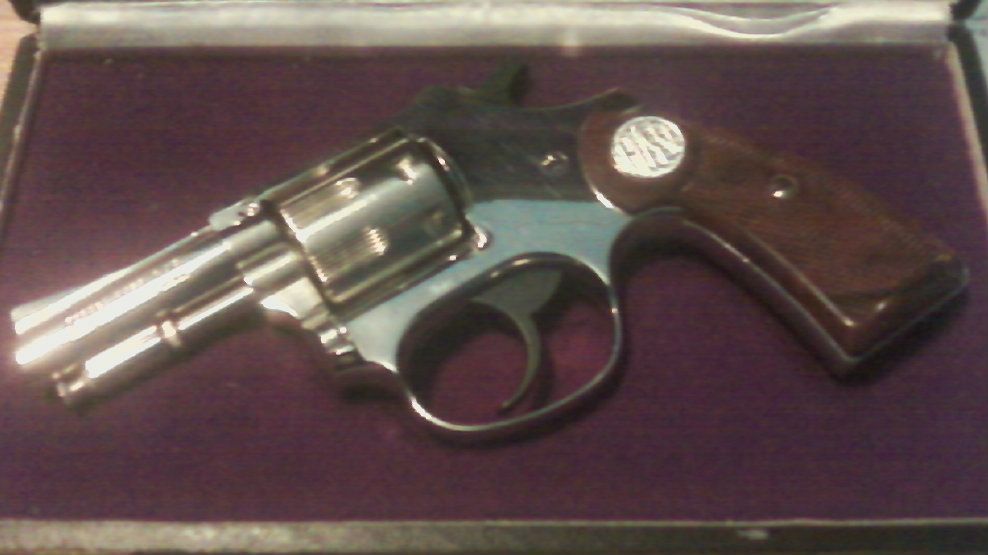
The Model 25 presentation case

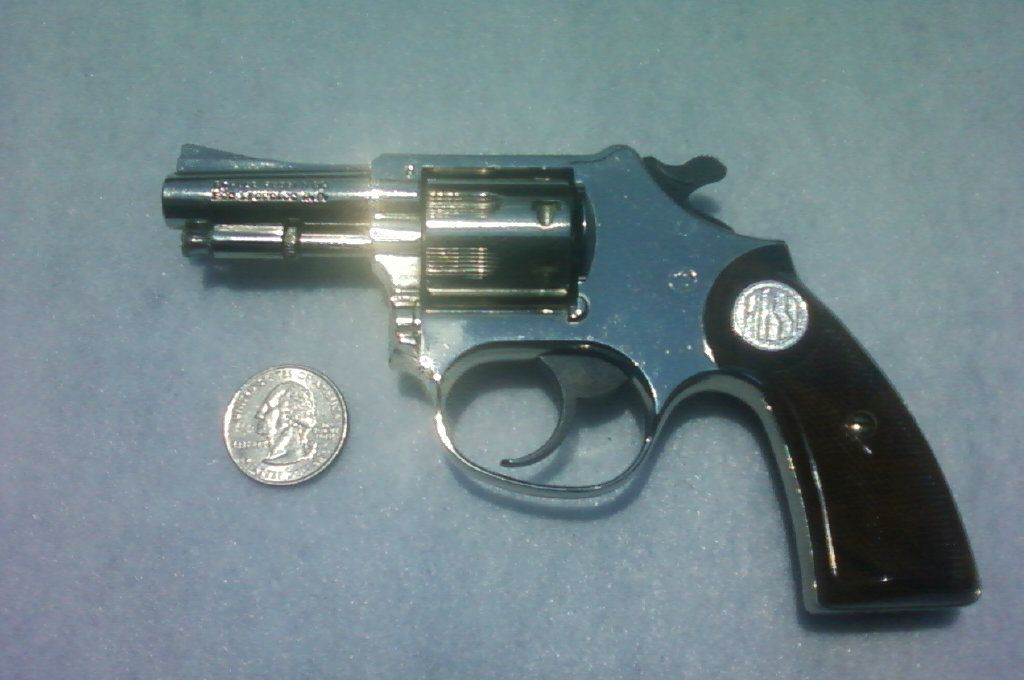
Recently, I came into possession of another little piece of history.  And I do mean little.  It is the Rossi Model 25, a petite revolver chambered in .22LR.  Known as the "Princess," this tiny little pistol is quite beautiful with its bright nickel-finish.  The left side of the barrel is stamped "AMADEO ROSSI & CIA/SAO LAOPOLDO R.S." while the right sideplate is stamped "MADE IN BRAZIL" with the Rossi trademark and the importer marking "FIREARMS INT'L CORP/WASHINGTON, D.C."  The right side of the barrel is stamped ".22 L.R."  The serial number is stamped on the frame below the grip.

Just barely six and a half inches long, with a barrel length of two inches, the Princess is smaller than a grown man's hand (a 3-inch barrel version was also manufactured, designated the Model 13).  Despite its diminutive size, however, the Model 25 has a swing-out seven-shot cylinder with a manual ejector rod.  It is a single-action / double-action revolver, and while the trigger is quite stiff (I would estimate it at around fifteen pounds), it is smooth with no slop.  The brown plastic grips have some black marbling throughout, and they sport a round medallion (a la S&W) bearing the Rossi logo.  Actually, these are some of the nicer grips I have seen on Rossi revolvers.  The grip is very short, and leaves little room for a big hand...  this gun was definitely made with ladies in mind.


The Rossi Princess
Shown with a quarter for perspective

The frames of the Princess revolvers are die-cast of Zamak (or Zamac), sometimes disparagingly referred to as "pot metal."  Zamak is a zinc-aluminum-magnesium-copper alloy, which is actually quite strong, certainly for the frame of a .22LR revolver (Hi-Point Firearms uses Zamak for the slides on their centerfire pistols and carbines).  This results in quite a light weight pistol.


The Rossi Model 25 is a copy of the third model Smith & Wesson "Ladysmith," an M-frame revolver manufactured during the first two decades of the 20th century. The M-frame was the smallest hand-ejector frame made, and was used for the .22 Long, and was discontinued in the early 1920s.  Rossi, a Brazilian gun manufacturer (now a member of the Taurus family of firearms companies), resurrected this revolver concept, manufacturing the Model 25 for 28 years from the 50s through the mid-80s, with nearly a million of the little revolvers sold.  However, because of U.S. gun laws, primarily the 1968 Gun Control Act, relatively few Model 25s were imported into this country, all of them between the years 1965 through 1969.  It is getting more difficult to find these guns, especially in good condition.

Surprising amount of firepower for such a diminutive gun
Rossi, like its parent corporation Taurus, has a lot of detractors and, to be quite honest, not without good reason.  For a period of time during the 1980s, both companies suffered from poor quality control, turning out a large number of guns that had problems.  It does not take long for such inattention to sour consumers to a product line, especially when the primary purpose for many of these products is personal defense.  However, the early guns manufactured by both Rossi and Taurus were of quite good quality (and I understand that both companies are doing much better recently, trying to address the QC issues).  The Princess is just such a gun.  The internal parts are well-made, the cylinder lock-up is tight with no play.  The timing on the cylinder is spot-on as well, with no chamber misalignment.  It is simply a nice, tight little revolver, especially when it is compared to a lot of the other inexpensive revolvers that were being imported around the same time (Rohms, for example, which were notorious for being poor-quality).  Not too shabby for a gun that originally sold new for between $35 and $40 at your local Ace Hardware (recently these revolvers have sold for as much as $250 - $350 on GunBroker and other sites...  I call that a good return on an investment!).

One thing I have noticed, however, is that when shooting .22LR cartridges, you can get a bit of powder-flash coming from between the cylinder and the forcing cone (no lead shavings like that old Rohm used to shower me with, though).  This does not happen with .22 Shorts or .22 Longs, and I have to wonder if it is due to the newer hypervelocity .22LR cartridges being so much more powerful than the .22LR cartridges of the mid-Sixties.  I will try some sub-sonic loads soon to see if that makes a difference.  Accuracy with various loads has been quite good for a short barreled revolver.  This one is definitely a keeper.

If you have a Rossi Model 13 or 25, and have any more information on this gun, please leave a comment below.  Let me know what ammunition your Princess likes, and how well it is holding up.  There is not a lot out there on these revolvers (thanks to Ed Buffaloe at unblinkingeye.com for a great write-up, and the various gun fora from which I have gleaned some nuggets of wisdom), so anything you might have to add would be appreciated.

For more information on Rossi:

http://www.rossiusa.com/

Friday, May 18, 2012

Gun Review: Metro Arms American Classic Commander 1911 .45ACP

For those of you who have been following this blog, you know that back in March of last year, I posted a review of the Metro Arms American Classic II 1911, which at the time I gave high marks.  More than a year later, my opinion of this pistol has not changed.  It continues to perform flawlessly (after having changed out the magazine catch, which I described in a post in June of 2011), and I am well pleased with this firearm.  Pleased enough, in fact, to purchase another Metro Arms 1911...  this time, the American Classic Commander.

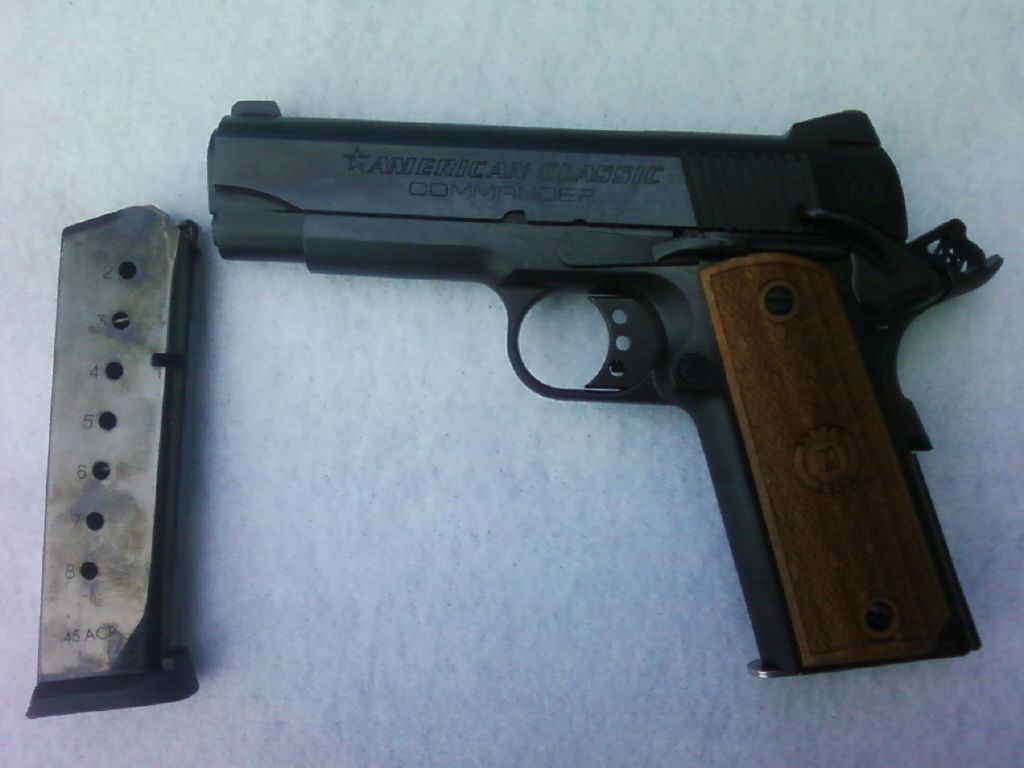
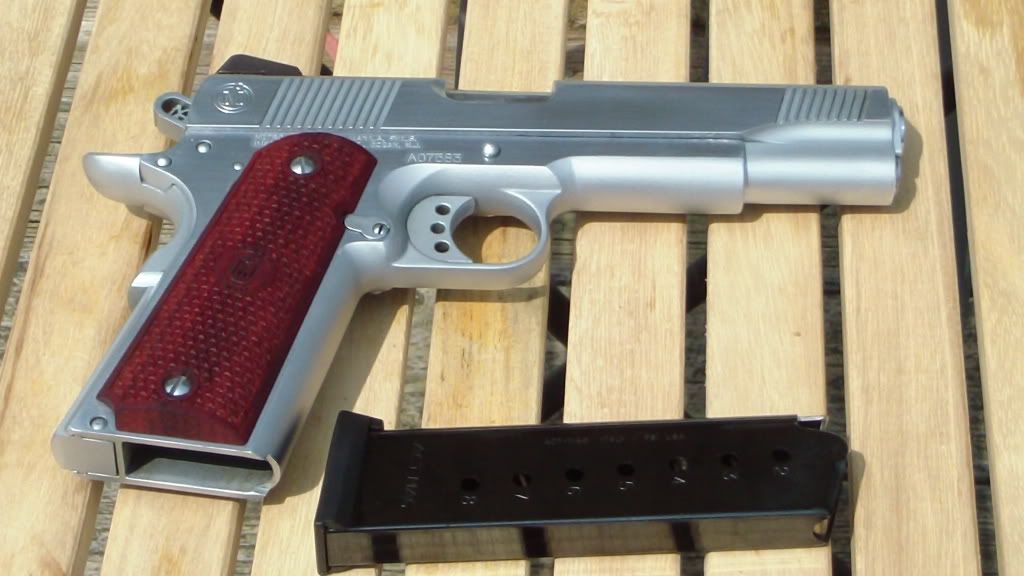
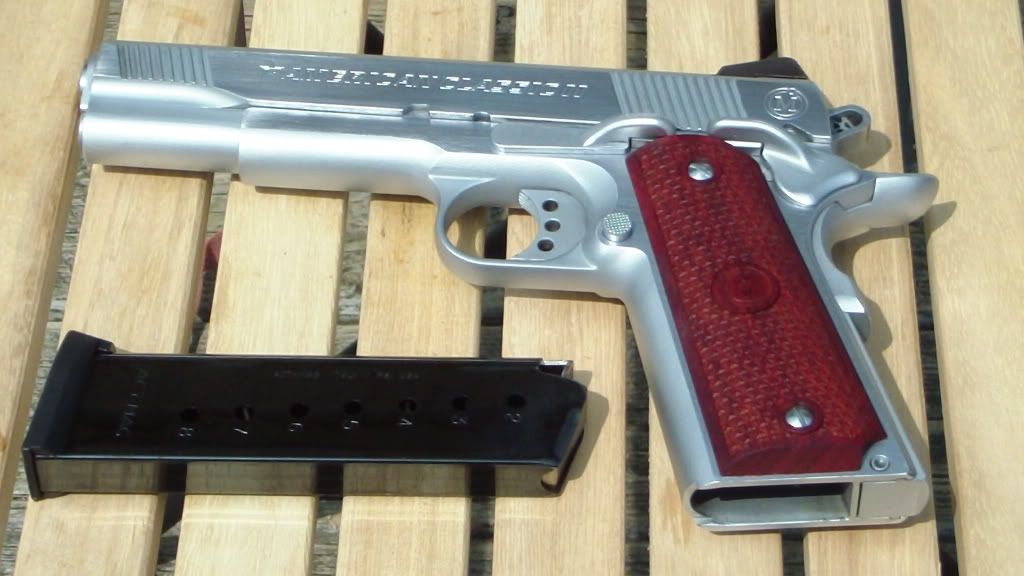
Metro Arms American Classic Commander


As you may well know, the Commander is a somewhat shorter version of the American Classic II.  The latter is a full-sized, or ""government," model, having a full 5-inch barrel with an overall length of 8.375 inches, and weighing in at 37.28 ounces empty.  The Commander has a slightly shorter 4.25 inch barrel for an overall length of 7.5 inches, and a weight of 35.2 ounces.  Not a whole lot of difference.  In fact, the two models use the same magazines interchangeably.  Both have the same grip length, and the controls are placed in the same locations on the pistols, so muscle memory is not affected by switching from one pistol to the other the way it would be with a similar gun with a smaller form factor (like a compact 1911, or a Sig P238, for example).

The particular American Classic Commander that I chose was the deep blue model, which I purchased from my favorite local gun shop, Tri-Cities Gun Depot.  Unlike the ACII, which is the hard chrome model, my Commander has a rich, dark blued finish.  The bluing seems very even, without any noticeably light spots.  One thing I have noticed, though, since I have had the pistol, and something that has been mentioned on the firearms fora I frequent, is that manipulating the thumb safety has left some scratches in the bluing under the safety, as though there might be a burr or rough spot on the underside of the safety lever.  There was also a very light scratch under the slide-release when I first disassembled the pistol (the proverbial "idiot scratch"), I am assuming from the factory.  Neither of these are deal-breakers for me, especially considering this is going to be a carry gun (provided it meets my reliability requirements) and therefor will be subject to much wear, but I would have preferred a little better QC on this front.

Shown with 8-round ACT mag, 7-round flush fit mag not included


For the most part, this particular pistol seems as well-made as the Classic II.  All of the parts seem well-fitted.  Like the ACII, this model comes with the extended slide-stop, extended magazine release, full beavertail, and extended thumb safety.  The grip safety is a bit more loosely fitted than that of the ACII, but it is not loose enough that it rattles.  The thumb safety engages positively, the trigger is smooth and has very little take-up (it is fitted with an over-travel adjustment screw, too), and the magazine catch engages easily and releases the magazines freely.  The slide to frame fit is also very tight, but not so tight that it drags and causes feeding issues.  Also, like the ACII, the wood grip panels that come with the Commander are nothing to write home about.  Functional, but not fancy.  One thing I will point out is that should you desire to change the grips, the oversized controls may necessitate some minor alteration of the replacement grip panels to allow them to fit without interfering with the operation of the thumb safety and slide release.

Thus far, using four different magazines, I have fired one hundred seventy rounds through the Commander, and I have had one failure during that time.  The ACT magazine that comes with the Commander is the same 8-round mag that is sold with the Classic II, and I had no issues using that magazine.  Likewise, my Springfield, Colt, and Kimber 7-round magazines have thus far been flawless with this pistol.  The one failure to feed that I have experienced has been with a flush-fit 8-round Triple K magazine, and that was with the second round during the first time I used that particular magazine.  Subsequent uses did not result in similar failures, so I am chalking that one up to magazine break-in.  I have only fired 100 rounds of Blazer Brass and 50 rounds of PMC Bronze 230 gr. FMJ rounds, and 20 rounds of Hornady Custom 185 gr. XTP JHP through the pistol at this time (the single FTF was with the ball ammo).  Thus far, it looks as though the factory magazine catch is working well, so perhaps Metro Arms has addressed that particular issue.

Accuracy has been very good.  Out of the box, my point of impact was about four inches to the left at 50 yards, consistently.  The Commander, like the ACII, has adjustable 3-dot Novak-type sights, so this was easily and quickly remedied.  Recoil is stronger than with the 5" model, enough that it is noticeable, but still not enough to be uncomfortable.  These pistols are just a lot of fun to shoot.

I have been well-pleased with the Metro Arms Commander up to this point.  I will continue to post updates if anything changes, but it looks as though this company is continuing to manufacture and market an excellent line of firearms.  And at an excellent price point...  this particular gun is in the sub-$500 range, but runs like a top of the line model.  I think JMB would be happy.

Friday, August 12, 2011

Plum Crazy Sportical Update: NcSTAR additions

In this follow-up post to my Plum Crazy Sportical review, I will be reviewing some recent additions I have made to the original.  Finally having given in to my curiosity about the AR platform, I am now wholly given over to the customization bug.  In addition to the NcStar back-up iron sights I installed shortly after having assembled the rifle, I decided to add a reflex sight.  Also, having nearly blistered my finger on the gas block after rapid firing 100 rounds, I began to think that a vertical foregrip might be in order. And as always, the guys at Tri-Cities Gun Depot were there to make it happen.

The first addition I sought to make was the red dot.  I have always been hampered with somewhat poor eyesight, being nearsighted with astigmatism.  As a result, iron sights are often difficult for me to see.  While the aperture sight of the AR is better suited to my vision than, say, buckhorn sights, at distances fifty yards and above, I still find it hard to get a proper sight picture.  The red dot sight works very well for me, however, making it easier for me to acquire my target quickly and remain on target.  I have used red dots in the past on different rifles, most recently an SKS and a .22LR plinker, so I thought adding one to my AR would be just the ticket.

The red dots I have used in the past have all been tube styles, but for this project, I decided to go with an open reflex sight.  My choice was the NcSTAR Tactical 4 Reticle Sight.  I know that NcSTAR often gets a bad rap from the armchair spec-ops guys on the firearms forums, but most of the people I have talked to who actually own and use their products have no qualms about relying on them.  Plus, with a lifetime warranty, I am willing to give the sight a try.  The different reticles are bright, clear and, while I chose to go with the simple red dot, the option to change reticles depending on the shooter's need is a big bonus to me.  The sight also has adjustable brightness levels, ranging from 1 to 7, so the shooter can pick the level that suits his or her need.  The kit comes with the sight, a tiny screwdriver to adjust the locking screws, an allen wrench to tighten the scope mounts as well as to make elevation and windage adjustments, two batteries, a cleaning cloth, and a rubber lens cover.  The sight was a cinch to mount on the top rail, and just a few minor tweaks of the reticle adjustments had it dead on.  One other thing I like about the sight is that it absolute co-witnesses with the iron sights.

My next addition was the foregrip.  The DPMS Sportical upper I bought comes with the Glacier Guard handguards, which are apparently proprietary to DPMS.  The holes on the bottom of the guards do not line up with all mil-spec weaver rails.  I first attempted to add a ProMag rail, but was unable to make it work with the Glacier Guard.  Somewhat frustrated, and not really wanting to change out handguards at this point, I was assisted in my quest by Tom and Brian at TCGD.  Tom showed me that (who else?) NcSTAR has an M4 Hand Guard Weaver Rail, which has a floating mounting screw that enables it to mate up with different handguards, the Glacier Guard included.  Feeling that my search was over, I started to look at foregrips, when Brian pointed out to me that the internal fins on the Glacier Guard (which give the handguards the heat dissipation from which the name stems) prevented the washer and nut from fitting properly.  Now this is where  it gets good:   with a great deal of care and patience, Brian used a file and knife to notch out the fins enough to allow the washer to fit, and the rail went on as though it were designed for this particular handguard.  In the meantime, I had picked out the Vertical Folding Grip by the Mako Group.  It has a great feel to it, fits my hand well, and as a bonus it has a battery compartment inside that I now use to store my spare battery and adjustment tools for the red dot sight.  And while I shouldered the rifle and decided where I wanted the grip to go, Tom tightened down the mounting screws to lock it into place for me.  These guys could not have made this any easier for me.  Now that is customer service.

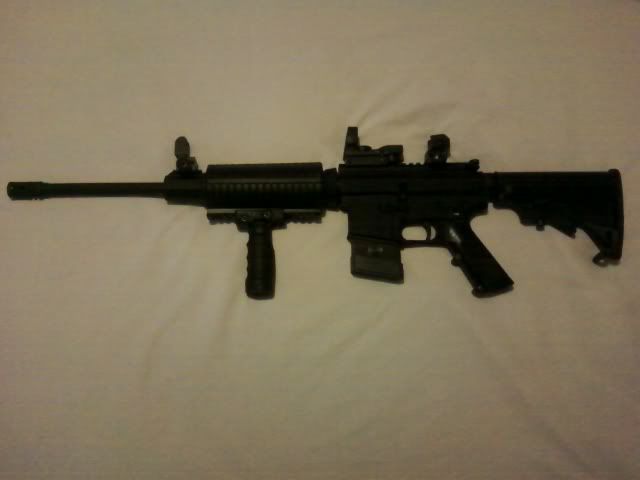
An hour later, I was on the range, blasting away at some aluminum cans at fifty yards.  Everything works just as it is supposed to.  The red dot was right on, and did not lose zero through 100 assorted rounds of Federal .223 FMJ and 5.56 FMJ.  The barrel got smoking hot, and even the Glacier Guards were uncomfortably warm to the touch, but the Mako foregrip made shooting comfortable, and really enhanced my aim shooting freehand.  It is hard to describe the enhanced ergonomics of using such a shooting aid...  it just makes it feel so much better.  Here is a crappy cell phone picture of the Plum Crazy Sportical as she looks now (the magazine is a Thermold 20-round polymer):


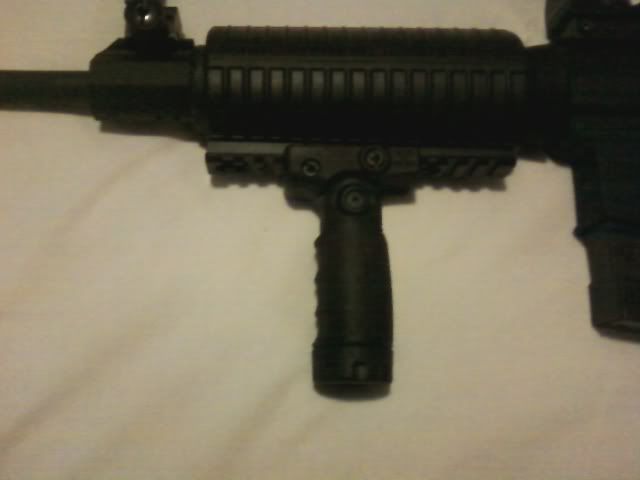
A close-up of the vertical grip and rail:


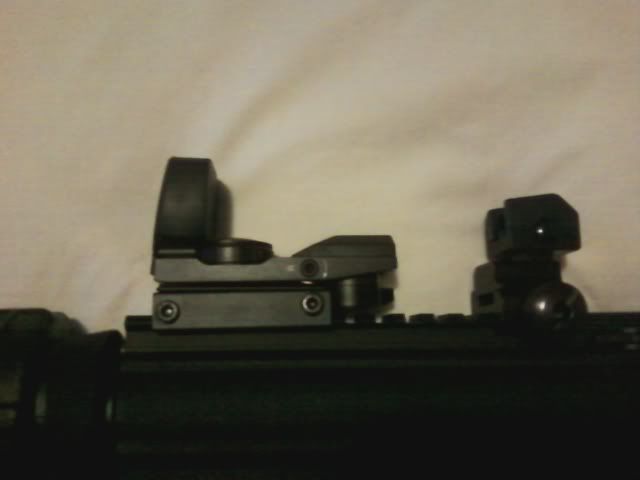
The NcSTAR red dot and rear BUIS:


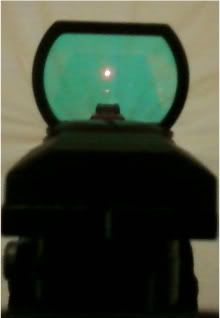
View through the red dot (setting 7):


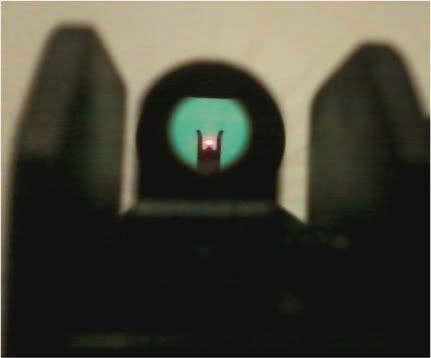
View of red dot and BUIS co-witness (setting 7):


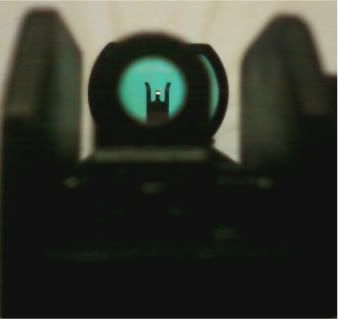
View of red dot and BUIS co-witness (setting 1):


Thus far, I am really liking this rifle.  It is accurate, has been totally reliable to this point, and is a lot of fun to shoot.  I will continue to post updates with respect to any of the parts I have added to this gun, to let my readers know how they continue to function.

Finally, just a thank you to Tom and Brian at the Gun Depot for their help in picking out my accessories, and helping me to install them.  When people ask me why I started shopping at Tri-Cities Gun Depot, I tell them it was for the low prices.  When someone asks me why I keep shopping there, I tell them it is because of the unparalleled service I receive there (and the prices are still the best in town, too).

Sunday, July 3, 2011

Book Review: The Complete Gun Owner by James M. Ayres

There are few things I enjoy more than shooting, but sometimes Mother Nature just does not want to cooperate.  So there are often times when I have to find some other way of occupying myself.  Luckily, for the firearms enthusiast, there are many related endeavors for which we can use our "down time," such as cleaning our firearms, reloading, rearranging our gun safe (yes, I have been known to do this), sorting ammunition, etc.  Rainy days also give me an opportunity to keep abreast of what is new in the world of shooting sports, by reading some of the sporting magazines that are available, or picking up a book on firearms.  Most recently, I picked up a copy of The Complete Gun Owner, by James M. Ayres (Gun Digest Books, 2008), and would like to take this opportunity to give a review of this particular book.


(Image courtesy of amazon.com)  The Complete Gun Owner is written on a very basic level, with the intent, I imagine, to make the information contained therein accessible to readers who are just getting involved in the shooting sports.  The sub-title of the book is "Your guide to selection, use, safety, and self-defense," and the book undertakes to cover each of these areas.  It is 271 pages long, and contains many color photographs.  The book's appendices contain information about federal and state firearms laws; state game and wildlife agencies; a list of gun, safe, and case manufacturers; and a web directory.  An index, however, was not included.

The book is divided into four main sections (five, counting the appendices).  First is a section of gun selection. Second, a section on basic gun use, including how to shoot, the care and cleaning of your guns, hunting, and what the author refers to as the "Tao of Shooting".  Third, a section on gun safety.  And lastly, the book covers self-defense with a gun.  Each of these sections is further broken down into chapters, each focusing on a specific aspect of the overall subject (for instance, in the basic gun use section, there are individual chapters on how to shoot handguns, rifles, and shotguns).

One thing that impressed me early on with the book is that the first chapter is dedicated to making "A Case for the Twenty-Two."  Unlike some other shooting enthusiasts, I still feel that the .22 is a great cartridge, especially for the beginning shooter.  And the author points out that this cartridge is useful for helping a first time shooter become acquainted with the sport, without developing bad habits, such as "the flinch," which can be brought about by starting off with a high-recoil cartridge, such as a .357 Magnum or a .45 ACP.  So it was refreshing to see a book devote a whole chapter early on to recommending the .22 as a viable weapon.

It is in the very first chapter, however, that I also started taking issue with some of what the author was saying.   Ayres makes it clear early on that he is not a fan of the revolver.  On page 33, he states that semi-automatics are "subject to fewer mechanical problems under field conditions" than revolvers.  Really?  I would like a citation for that assertion.  I, personally have had mechanical failures with nearly every semi-automatic I have ever owned, some due to faulty ammunition, some due to bad magazines, some due to operator error, and some due to problems with the actual gun. I have yet to have a single mechanical failure of any kind with a revolver...  ever.  The closest I have ever come is a failure to fire due to a bad primer, in which case I simply pull the trigger again and "bang."  Revolvers are one of the most user friendly platforms for new shooters:  there is no slide to have to rack, one need not worry about "limp-wristing," no safeties to have to learn, etc.  The author also denigrates lever-action and bolt action rifles in favor of the semi-automatic (that is until page 104, when he talks about his bias "for" bolt action rifles for hunting...  er, ok...  which is it?).

Some of the firearms that the author recommends seem to be odd choices, based on the audience to whom he is reaching out.  For a book aimed at beginning shooters, the author recommends the Ruger Mk III and the Browning Buckmark,  two excellent firearms by most anyone's standards.  However, for someone who has had to disassemble and reassemble these pistols, recommending them to a novice seems like a bad idea.  Ayres also seems to recommend the Beretta Neos and Sig Sauer Mosquito, even though he states that he has no personal experience with either weapon, and he is just going by the reputation of the company.  Which is like recommending someone buy a Ford because they have such a great reputation -- on one hand you might wind up with a Mustang, but on the other hand, you might end up with a Pinto.

Aside from the wealth of opinion that the author shares in the book, there are also factual inaccuracies, poor editing, and photographs that do not seem to belong.  Did you know that the AK-47 is chambered in 7.61x39?  That's ok...  it's news to the Russians as well, as they are still operating under the mistaken assumption that it is 7.62x39.  And sure, this may just be one more instance of the editor missing something, and maybe it is not that big of a deal, or maybe it is to the new shooter who is now looking for a non-existent cartridge.  Then there is the assertion that the Remington 552 BDL is basically the same gun as the 597, "without the fancy checkering."  Sure...  other than the fact that the two guns have completely different actions, the 552 has a tubular magazine while the 597 has a removable 10-round magazine, and the 552 will chamber and fire .22 Short and .22 Long as well as .22 LR, whereas it could be dangerous to attempt to do so with the 597.   But yeah, other than that, the same gun.

Then the author offers up such gems as "eighty-five to ninety-five percent of the effectiveness of any shot is determined by shot placement," in big, bold font on pages 167-168.  Yet nowhere does he offer any statistical evidence to back up this claim (one might as easily say that 100% of the effectiveness of any shot is due to shot placement, in that if you miss the target completely, it will have no effect at all).  Or when he states that twenty-two pistols are commonly carried by Israeli assassins (and likewise U.S. operatives) because they "might only receive a few days training and practice with a handgun" (page 195).  Citation, please?  And this brings us back to the chapter on twenty-twos in that Ayres states on page 29 that the .22 is commonly used in a defensive role by "individuals and members of certain organizations."  Well, I guess if Israeli assassins can be trained to use a .22 in a few days, then why should a novice gun owner be any different, right?

On page 179, Ayres discusses the handgun shooting positions used in defensive shooting.  The first position he covers is hip shooting (no relation).  In the first paragraph, he states that "(m)any experts deride hip shooting as being totally useless....  Perhaps they are setting their sights incorrectly."  Setting their sights incorrectly?  OK, well, Mr. Ayres is holding himself out to be an expert on firearms, not anatomy, after all.

Poor editing is, in my opinion, the primary problem with this book, and it is most clearly evidenced by photographs that are placed throughout the text in a seemingly random fashion.  For instance, chapter 5, "How to Shoot a Shotgun," is illustrated with a total of nine photographs:  seven photos of someone wielding a Ruger Mini-14 semi-automatic rifle, one photo of a handgun's sight picture, and one photo of someone wielding a single-shot rifle.  Not a picture of a shotgun to be seen.  Other masterful touches of editing include two copies of the same exact photograph on the same page (Wait, this looks familiar... where have I seen this photo before?  Oh yes, in the aforementioned shotgun chapter.), one with the caption "Correct sight picture," and the other with the caption "Correct sight alignment." There is also a firearms terminology section at the beginning of the book  in which the terms are not in alphabetical order. And let us not forget the editorial comments that were left in the text when it went into print, such as when the editor asked the author to provide "some specifics that make it a "good shooter," when referring to the Savage Model 64.

Taking all of this into consideration -- the overly opinionated approach by the author, the poor editing, and the reliance upon anecdote as opposed to documentary evidence -- means that I just cannot recommend this book to anyone, especially someone new to firearms.  While there may be nuggets of wisdom hidden in this book, there is also enough that is inaccurate or misleading to cause confusion in someone who is just getting his or her feet wet in the shooting sports.  I would look to other texts, such as those penned by Massad Ayoob, if you are looking for well-written, accurate books on firearms, shooting, and self-defense (The Gun Digest Book of Combat Handgunnery is just such a book).

Tuesday, June 21, 2011

The $500 AR 15 Project -- My Plum Crazy DPMS Sportical

The AR 15...  for many, it is the end-all be-all of rifle platforms.  And for good reason:  it can be just about anything you want it to be.  From short barrel patrol rifle to long range, heavy barreled varmint gun, the modular nature of the AR 15 lends itself to customization like no other weapon.  Stocks, handguards, pistol grips, sights, barrels, gas blocks, fire control groups...  there is nothing on an AR that cannot be made to match a particular shooter's preferences.  Even caliber is up for grabs:  the standard 5.56 / .223 can quickly become a .204, 5.45, 6.8, 7.62, 9mm, or even .22LR.  The choices are seemingly endless.

And in spite of this, I have never owned an AR platform.  And to be honest, until recently, I have not felt as though I have been missing anything.  I have been very happy with my .22s, my SKS, and my milsurps.  And I suppose I still thought of the AR in terms of the original M16s that our boys in 'Nam got saddled with -- clumsy, prone to jam, impossible to keep clean, and generally disparaged by those veterans who chose to share their stories with me about their time in the service.  Now, a lot has changed since the Sixties (thank God), and the AR has benefited from some technological enhancements that have made the platform much more reliable.  The direct impingement gas system still needs care and cleaning, but you need not be fanatical in your fastidiousness anymore.

Recently, I had a change of mind, and decided I would like to join the thousands of AR enthusiasts and see what I have been missing.  And to do so, I also decided to undertake a sort of self-imposed challenge:  to build a lightweight AR, and to do so for $500.

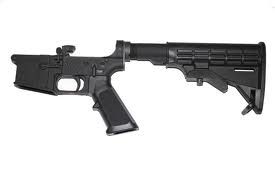
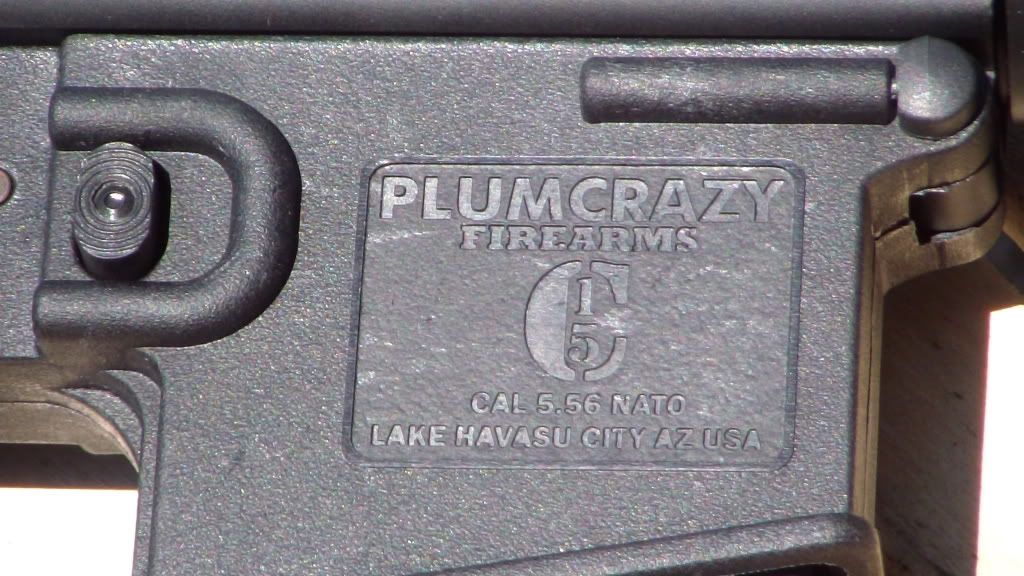
Now, those of you who have ARs know that this is a nearly impossible task.  Nevertheless, I had an ace up my sleeve.  There is a company in Arizona called PCF manufacturing who turns out polymer AR lowers (C-15) under the name brand "Plum Crazy."  These lowers are made of a "space-age" teflon-impregnated polymer, designed to near mil-spec dimensions, meaning that they will mate with just about any mil-spec AR 15 upper. And these lowers cost $130...  complete.  That's right, this is a complete lower, including fire control group, bolt catch, mag release, and six-position collapsible stock, all for $130.  Interestingly, the fire control group includes a polymer hammer and trigger, the mag catch and release are polymer, and even the take-down pin and pivot pin are polymer.  All of this equals reduced weight.

(Image courtesy of clark-corner.com)  Before I went Plum Crazy, I did a lot of research on the product.  I have had several polymer pistols, as well as polymer stocked rifles (a .30-'06 and an SKS, for example), so I am not too worried about the polymer not being able to handle the stresses involved.  Especially considering the majority of stress is absorbed by the upper on an AR.  I did come across a few instances of lowers that had broken, but for every bad experience I found, I read three or four positive reviews.  And more often than not, the naysayers were not owners of the Plum Crazy firearms, but "knew a guy who had a friend who's brother had one blow up..."  Not exactly dealing with raw data in that situation.

Most importantly, however, is that the company PCF Mfg. offers a 100% lifetime warranty on their products. I dig a company that will stand behind its product.  And even the few people I found who had experienced broken receivers (usually their own fault due to dropping the gun or torquing the receiver while trying to mate it to the upper) had found the company quick to replace their lower.  And they are made in the USA.  I figured it would be worth a try.  It certainly helps my bottom line, both with weight and cost.

Luckily for me, a local gun shop, Brackin's Gun Alley stocks the Plum Crazy (March 2013 update:  unfortunately, I can no longer recommend Brackin's Gun Alley, and I will just leave it at that).  I was able to pre-order one for $130, which means that after background and tax, I was out $153.  When I got the receiver, I was suitably impressed.  The lower seemed well made, and was thicker and stronger than I had imagined.  The finish has a few minor molding remnants on it, but could be easily removed.  The trigger was what astonished me, however...  while not a match group by any stretch, it is very crisp, with little to no slop, and breaks cleanly at between  4.5 and 5 lbs.  Extremely good for a stock trigger in this day and age.  The one thing that I found fault in is the safety.  An AR safety is designed such that it cannot be engaged if the hammer is in the forward position -- the hammer must be cocked back before you can put the safety on.  The Plum Crazy safety, however, can be engaged while the hammer is forward.  Not a deal breaker, but it means it is not mil-spec in this regard, and is something that prospective owners should be aware of.

Now that I had my lower, I needed an upper to go with it.  In keeping with my light weight requirement, I knew I was going to be looking at a pencil profile barrel, most likely the minimum 16".  I also decided to look at some "slick side" receivers:  receivers that do not have the forward assist, shell deflector, or dust cover.  As a lot of AR fans will point out, these uppers are not mil-spec, but then, neither am I.  I am not going to be heading out to the sandbox anytime soon, so I really do not need the dust-cover...  this is a plinker, plain and simple.  Forward assist is just a way of getting a few more shots in before cleaning your gun, or for forcing a frozen bolt forward in sub-zero temperatures, and is not necessary for my purposes, either.  And lastly, as a righty, the shell deflector would do me no good at all.

So, keeping this in mind, I decided to go with the DPMS Sportical 5.56 upper from MidwayUSA.  The Sportical is designed on the lo-pro receiver, meaning flat-top, no sights, and a railed gas block.  It is designed for someone who is going to add optics to their AR (which I am...  I have a red / green dot sight that needs a good home).  It also comes with your choice of pencil profile or heavy barrel, both in 1 in 9" twist.

(Image courtesy of midwayusa.com)  Well, it just so happens that MidwayUSA had these uppers on sale for $360.  So I ordered one.  I got it via UPS today, and I assembled the lower and upper this afternoon.  Having read about the tight fit many Plum Crazy owners were experiencing, I was poised to expect a difficult time assembling the rifle.  It was not to be, however:  the pivot went together quite easily, and the rear of the receivers popped right together with just a little pressure from the heel of my hand.  Both pins went in snugly, and the two halves fit as though they were made for one another.

I finally had my AR.  And I came in just over my goal of $500, at $513.  Well, almost.  I forgot the magazine.  A quick trip down the road to the gun shop fixed that.  Add a 30 round steel magazine for $14, and that brings us to a grand total of $527.  If it weren't for Tennessee's insane sales tax and the background check, I would have made it.

So, I didn't make my goal of $500, but I came close enough to make me happy.  This rifle isn't going to make the front page of ARF.COM, and I am sure that many AR purists will turn their noses up at it, but it fits me well.  I quite like it so far.  Especially the way this gun shoots.  It is almost ridiculously light, just over 6lbs with red dot and 30 round magazine.  I may look at adding back-up iron sights at some point, but for now, for my purposes, the red dot is sufficient.  I think it is going to be a great little rifle.  I have put 25 rounds through it (Federal .223 bulk box 55 gr. FMJ), to sight in the red dot, and to break in the barrel, cleaning after each round per the instructions from DPMS.  Each round chambered and fired flawlessly, spent brass was positively ejected to my right, and the plastic lower hasn't blown up yet.  When I get through the break-in process, I will post some pictures or a video of how it is shooting.  It may be time to break out another Osama bin Zombie target!!

Update:  I picked up a set of iron sights at Tri-Cities Gun Depot this week, and switched them out for the red dot.  Here are some pictures of the Plum Crazy Sportical setup:


Monday, June 6, 2011

MetroArms American Classic II -- EGW magazine catch and Pearce grip insert review

This episode of Shooting from the Hip is a follow-up to my review of the MetroArms American Classic II model 1911 pistol.  Specifically, I recently completed my first two upgrades, and I wanted to share with you what I changed, as well as why I did so.

Now, you may be asking yourself why, if I like the ACII so much, I felt the need to change something.  Well, for one thing, it is a 1911, after all, and one of the beautiful things about this pistol is that it is a platform that begs one to customize it to one's own preferences.  From grips, to sights, to triggers, hammers, even guide-rods, there isn't much on the 1911 that cannot be tweaked to fit the individual shooter.  In this particular case, my first upgrade was to add a Pearce rubber grip insert.


(Image courtesy of pearcegrip.com)  Now, while I am a big fan of wood grips on a 1911, the slim aspect of the 1911 doesn't fill my hand very well.  I have big hands, and I am used to double-stack guns that are wide enough to fit my hand well.  Part of the attraction of the 1911 though is the slimness, making it a good carry pistol, easy to conceal, so I did not want to lose that aspect.  My choice, therefor, was to try the Pearce grip insert:  a rubber insert that adds finger grooves to the frontstrap, while not greatly altering the thickness of the grip itself, and still allowing the use of the wood stocks.  Installation could not be simpler:  simply unscrew the grips, put the grip insert on aligning the precut holes over the grip screw bushings, then replace the grips.  The insert is cut generously, leaving some trimming to be done, but an X-acto knife makes quick work of that.

Range time with the new grip definitely showed a difference in the handling of the pistol.  The rubber grip afforded me a firmer grasp on the firearm, and it seemed to point more naturally.  Whereas before I installed the Pearce grip, recoil would occasionally cause the pistol to shift in my hand, I found that this was no longer the case with the new finger grooves.  Speed and accuracy of follow-up shots increased perceptibly.  I am curious as to whether the grip will prove to be durable, since the rubber under the stocks is rather thin (by design, of course), but time will tell.

The second modification I made to my ACII was to install a new magazine catch.  The one issue I have had with the pistol is that on a couple of occasions, it has failed to chamber a round when I have manually racked the slide.  I have not had this issue when using the slide release, only when "slingshotting" the slide.  This issue has been mentioned on a couple of firearms forums, as well.  It seems that the magazine catch on the ACII may be a bit low, allowing the magazine to sit a fraction of an inch lower in the magwell than normal.  This causes the top round in the magazine to have a bit of a higher jump to make it into the chamber.  Not much of an issue with round ball, but it can cause hollowpoints to jam.  As I intend to use this gun for home defense and possibly self-defense, it must reliably cycle hollowpoints.

One solution to this problem that I discovered on the M1911 forum (a great place to find information about this amazing weapon platform) was to change out the factory mag catch with a replacement that is machined to hold the magazine higher in the magwell.  One such product is manufactured by the company EGW, or Evolution Gun Works.  The HD Higher Mag Catch is available in either blued or stainless, is milled from solid 4140 Chromoly steel, and is designed to hold the magazine .020 inches higher than a standard mag catch.

While the company states that the part should fit "in most good quality 1911s," like any other "drop-in" 1911 part, some fitting is often required.  This was the case with the ACII:  a couple of minutes of light grinding and buffing, and the catch fit perfectly.  And it works as advertised.  The factory catch allowed the magazines to sit just a fraction of an inch lower in the magwell, and I could hold up on the bottom of the magazine and it would move ever-so-slightly up.  With the EGW catch, the magazine base is flush with the bottom of the magwell -- a nice, tight fit, holding the top round in a more direct line with the chamber.  Hand racking the slide several times with three different magazines showed that the rounds fed much easier into battery.  Pressing the EGW catch still allows the empty magazines to fall away freely, as well, so there should be no issue with tactical magazine changes.

After another 50 rounds (Federal 230 gr. FMJ) through it today, with no failures of any kind, the American Classic II by MetroArms continues to impress me.  It is definitely worth looking at if you are interested in a 1911.  I would also recommend looking at what EGW has to offer, with respect to aftermarket 1911 parts.  The website is easy to navigate, ordering was simple, and delivery was fast.  Three things I look for in an online seller.  You might also check out what Pearce has to offer, not only for the 1911, but for a variety of other pistols as well.

Monday, May 23, 2011

Metro Arms American Classic II -- First Shooting Video

Had a few free minutes today, so I thought I would take a quick little video of some range time with my Metro Arms American Classic II.  Not the best shooting, and not the best video, but I am working on both.  All told, I put another fifty rounds through my ACII today, all Remington 230 grain JHPs, without a single failure of any kind.  Here are the last four magazines worth -- 8 rounds in the ACT magazine that comes with the pistol, 7 rounds in my Springfield magazine, 7 rounds in my Kimber magazine, and the last six shots were also in the Springfield mag.  At a distance of about 15 yards.


(Note:  The shots on the left hand target are from an earlier session with my wife shooting her Ruger LCR.)

The more I shoot this ACII, the more I like it.  The action is tight, yet slick, and seems to be getting better the more I shoot it.  Absolutely no problems at all with the jacketed hollow points, even cheap Remington bulk box rounds.  I would like stocks with a little more "grip," as the factory stocks are a little smooth for my taste, so that may be my first real customization.  Still, it is a great gun for a great price.  I cannot wait for the Amigo to make its way to my locale, as I am really looking forward to getting my hands on one.
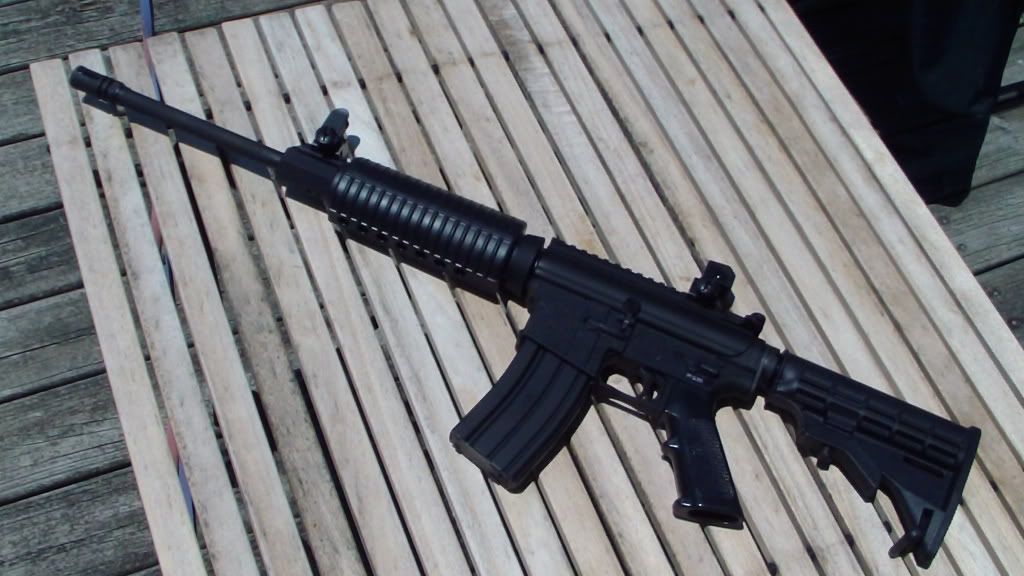
Thought I would throw in a couple of pictures of the hard chrome ACII:

Monday, May 16, 2011

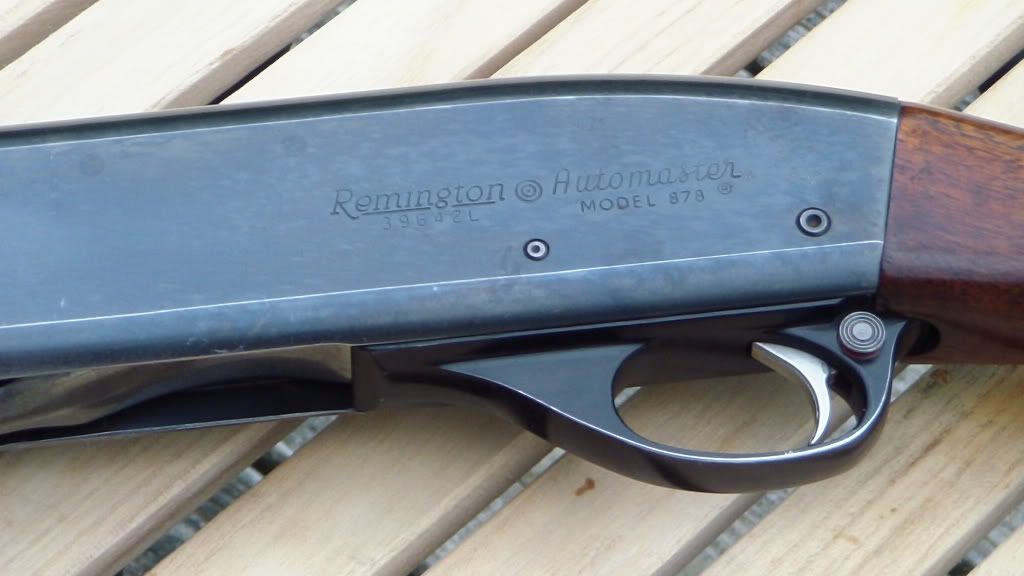
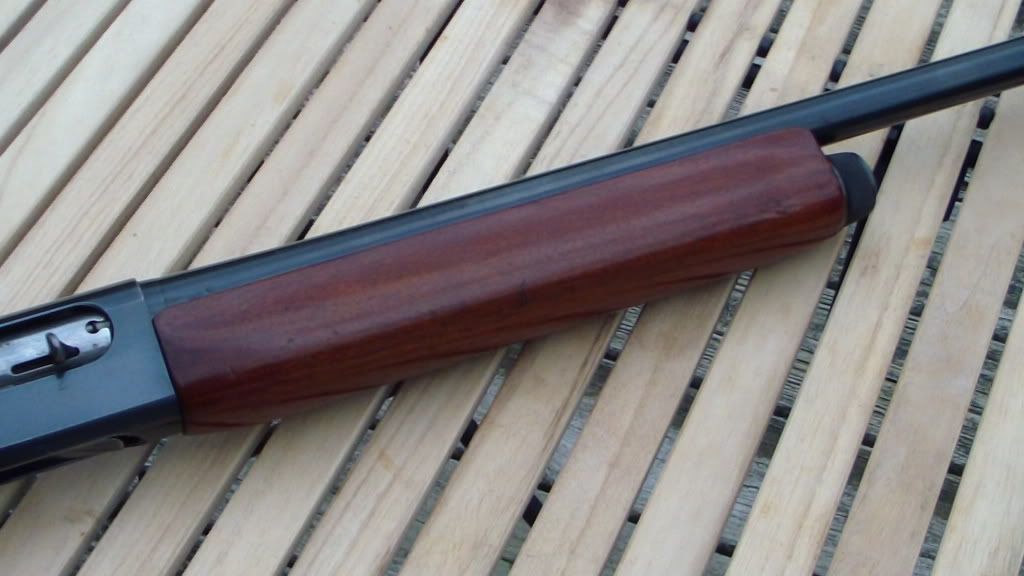
Gun Review: Remington 878 Automaster semi-automatic shotgun

I have not added to Shooting From the Hip in a while, but it was not without reason.  I recently acquired a new camera, the Samsung Q10 camcorder, which I hope to be using in the near future to begin filming video segments for SFTH.  I am still getting acquainted with it, but I think it will be a great little camera, and I used its still shot capability for today's entry.  And be warned:  today's entry is a little long, because we are going to go in depth on this particular firearm, but I hope it is beneficial to some of you out there.

Speaking of today's entry, I have decided to look at one of my more recent acquisitions, considered by some to be an "obsolete" firearm, but which I have found in the short time I have had it to be anything but obsolete.  It is the Remington 878 Automaster.  I know several of you may be scratching your heads thinking I must be mistaken, but this is not a misprint.  Everyone has heard of the model 870 Wingmaster, one of the finest pump-action shotguns ever produced.  Very few have heard of its sister, the 878 Automaster, a semi-automatic shotgun based on the 870 architecture.  And with good reason...  the 878 was only manufactured for five years, with somewhere in the neighborhood of 63,000 (give or take a few) Automasters produced.  These were heady days for Remington, a company at the top of its game and which was putting out some of the finest firearms in the world.  It was also a time for innovation and experimentation, and Remington was making the most of it.  During the early part of the 1960s, Remington was manufacturing and marketing no less than four different autoloading shotgun designs:  the model '48 ('48 - '68), the model 58 ('56 - '63), the model 878 ('59 - '63), and the model 1100 ('63 - present).  Eventually, the 1100 design won out, but many feel that all of their designs were effective platforms.

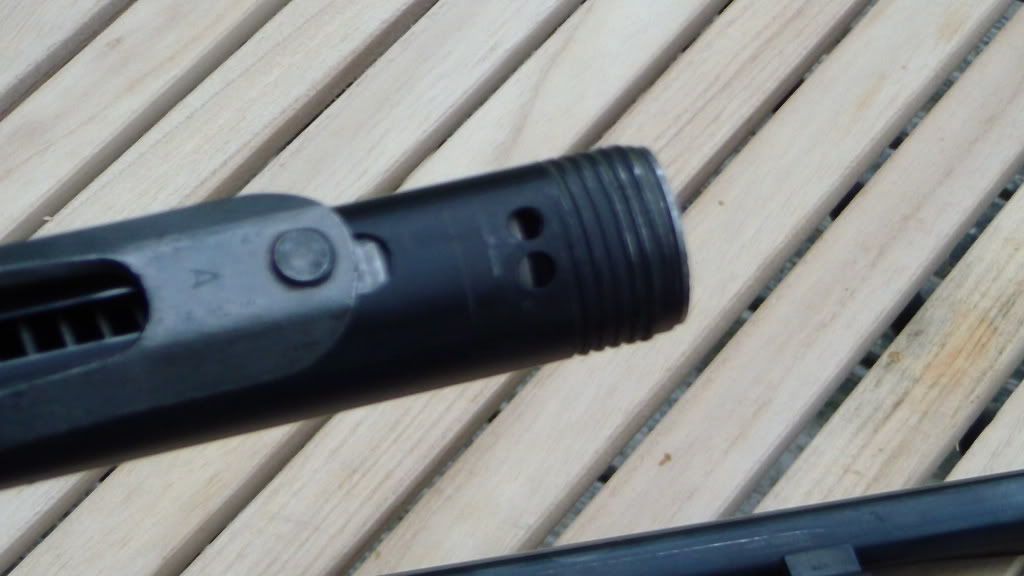
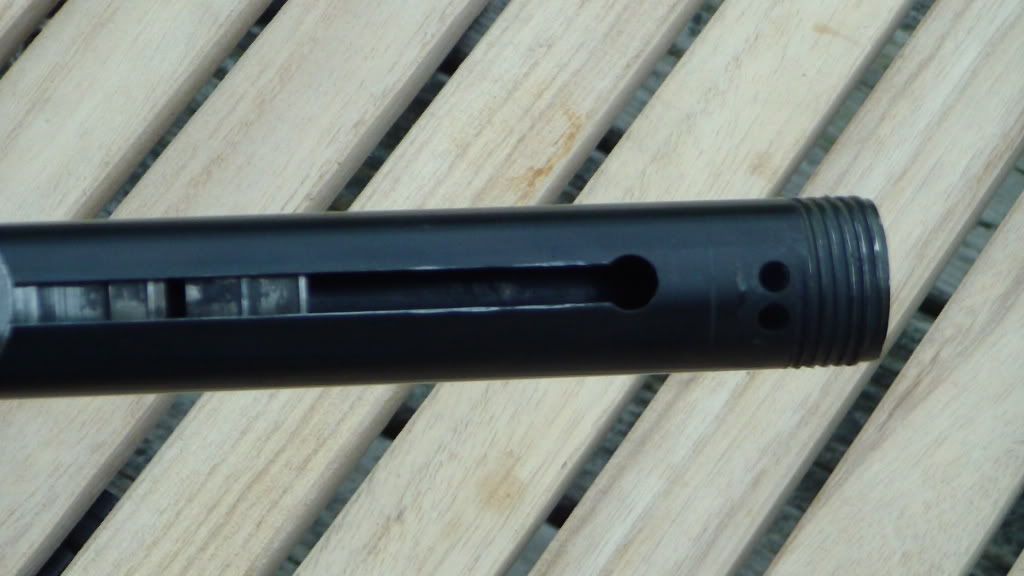
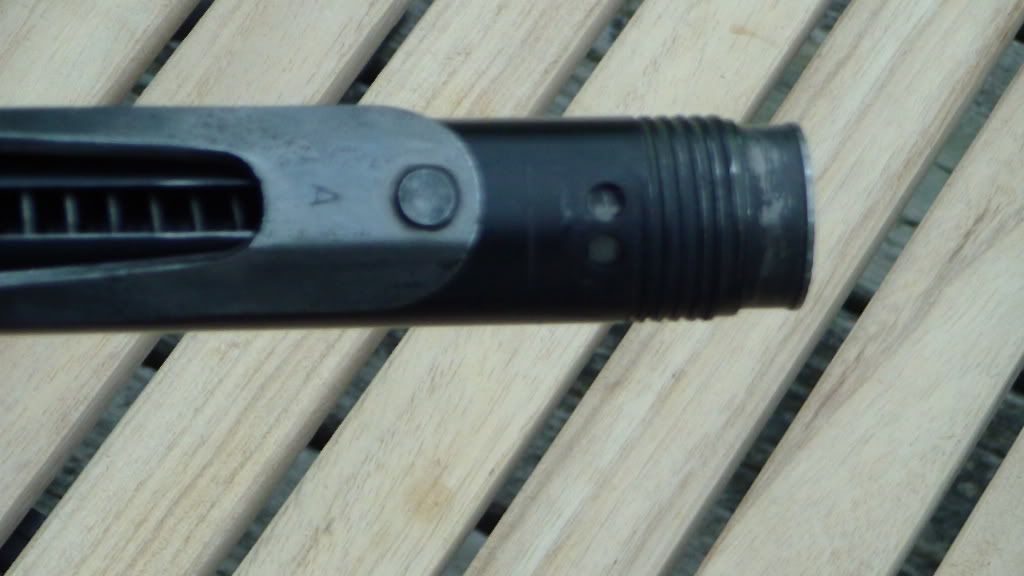
The 878 utilizes a gas piston operated by siphoning off combustion gases from the barrel.  Two gas ports located in the barrel ring direct the gases down into the magazine cylinder, where the piston assembly is located.  The piston is then forced backward, operating the action bar which opens the bolt, ejecting the spent round, while the next cartridge is pushed out of the magazine, into the receiver.  The piston return spring then forces the piston and action bar back forward, allowing the bolt to return into battery, directing the new cartridge up and into the chamber.  It is a slick, easy action in operation, and the mechanism greatly reduces felt recoil as so much energy is redirected into operating the piston.  And, unlike the model 58, there is no need to adjust the gas feed for different power cartridges.

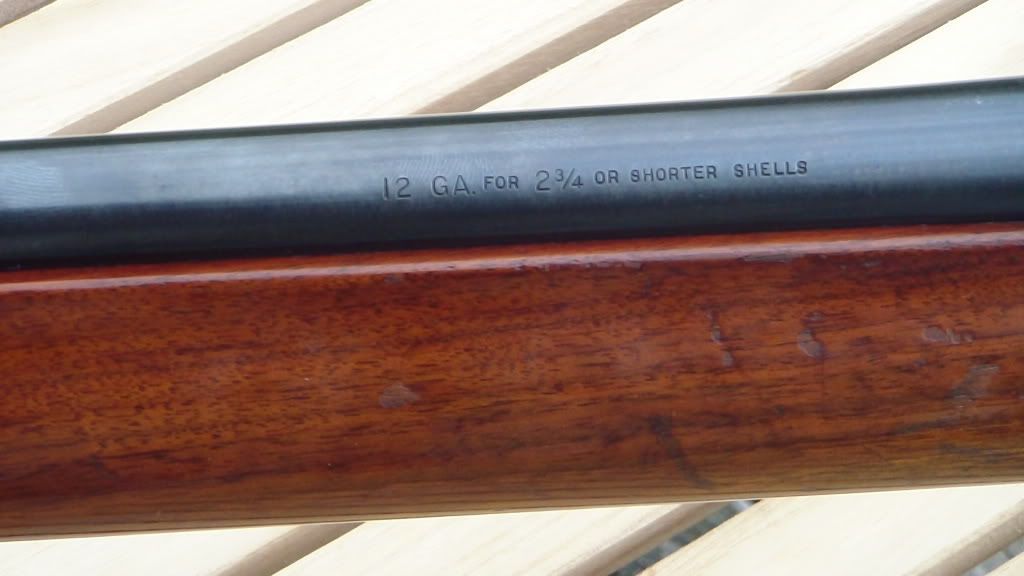
One downside to having the piston located in the magazine cylinder, however, is that the capacity of the magazine itself is reduced.  The 878 has a magazine capacity of two shells (with one in the chamber making a total of three shots) -- the space that in the 870 is taken up by shells three through five is now home to the piston assembly and the return spring.  This is not an issue for me in that I am limited to three shots by law for migratory birds, anyway.  And since the 878 was designed to use 2.75" shells only, I will not be using it for turkey or deer hunting, so migratory birds and clay pigeons will be my primary use for this gun.

My Automaster is a 12 gauge, 28" barrel with a fixed modified choke.  I of course got it used, and it came with no paperwork, so I called Remington to obtain a copy of the owner's manual, which they are sending me (more on this later).  According to the very friendly and helpful gentleman I spoke with at Remington, it was manufactured in 1960.  There is some light rust in one spot on the receiver, as well as a small spot on the bolt, which I need to touch up, and the bluing is a bit thin in several places.  The wood is nice, but has several dings and scratches which I need to address, as well.  All in all, not too bad for a gun made fifty-one years ago.

I had a chance to test the Automaster by shooting some clays a few days ago.  I was using Remington Lead Game load, 12 gauge, 2.75", 7/8 oz., 7 1/2 shot... a very light load, which is what Remington recommends for this gun, as today's modern loads may be a bit too heavy for the antiquated gas system to handle.  I fired fifty rounds through the gun, without any malfunctions of any kind.  The action cycled well, very smoothly, ejecting the spent shells several feet away from me, even considering the light loads I was using.  As I said above, the felt recoil was negligible...  not like shooting a 12 gauge at all.  The gun is very light, mounts easily to the shoulder, and the 28" barrel swings very easily and smoothly.  The trigger pull is fairly light (ahh, those were the days when guns were designed by shooters, not lawyers), and there is no slop in it either.  I had no problems slapping it as I was swinging through the clays.  I was very pleased with the gun's performance (my own performance, however, is a different matter altogether).

Now, you may be asking yourself, "I thought you said there were going to be pictures."  I am coming to that.  One of the only issues I have had with this gun is finding out how to clean it.  Anyone who has had a gas-operated firearm knows that in order to keep the gun functioning properly, one must keep the gas system clean.  Now, for the life of me, I could not figure out how to remove the gas piston so that I could clean it.  So, naturally, I hit the internet to find out how to do so.  And much to my chagrin, I could find no information at all on this shotgun.  Oh, there are plenty of people out there who are more than willing to sell you a copy of an owner's manual, or a copy of a schematic, or a copy of two pages from an American Rifleman magazine from 1961 that shows how to take down the 878 (for a mere $4.98 + $3.00 shipping, I might add).  This just burns me up.  But, based on the condition of the outside of this gun when I got it, I was naturally concerned about the inside of it as well, so I broke down and bought a Remington Arms Factory Gunsmith Service Manual for the 878 (turns out it was a copy, as well) for a measly $11.25, shipping included.

Now, we live in an age where information is power.  And I just spent eleven bucks in order to get some information that should be available for free (granted, Remington is sending me the owner's manual for free, so kudos to them...  it is service like this that keeps me coming back to them).  So I am going to post a series of photographs showing you how to disassemble the model 878 to remove the gas piston for cleaning, so hopefully no one will have to pay outrageous prices for photocopies of gun manuals again.  (It should go without saying that if you the reader are not confident in your ability to disassemble and reassemble any firearm properly, you should seek the assistance of a trained professional.  If you choose to continue, you alone are solely responsible for any mishaps, including injury or death, that you might experience as a result of failing to properly reassemble your firearm.  In other words, I assume no responsibility for your mistakes.)

First, here is the 878:


Before working on any firearm, check to make sure it is unloaded...  then check again.

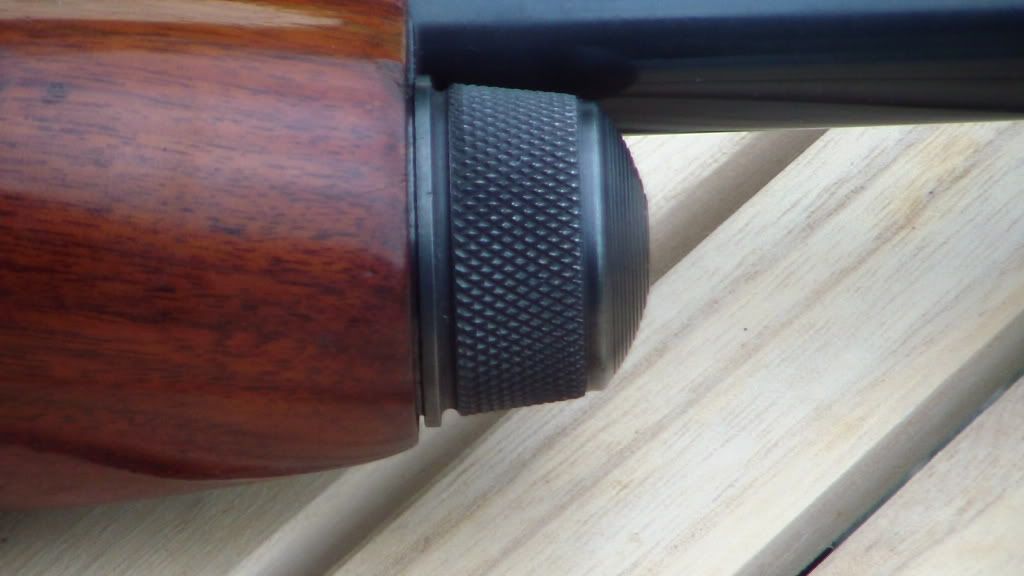
Now, first, remove the magazine cap by unscrewing it.


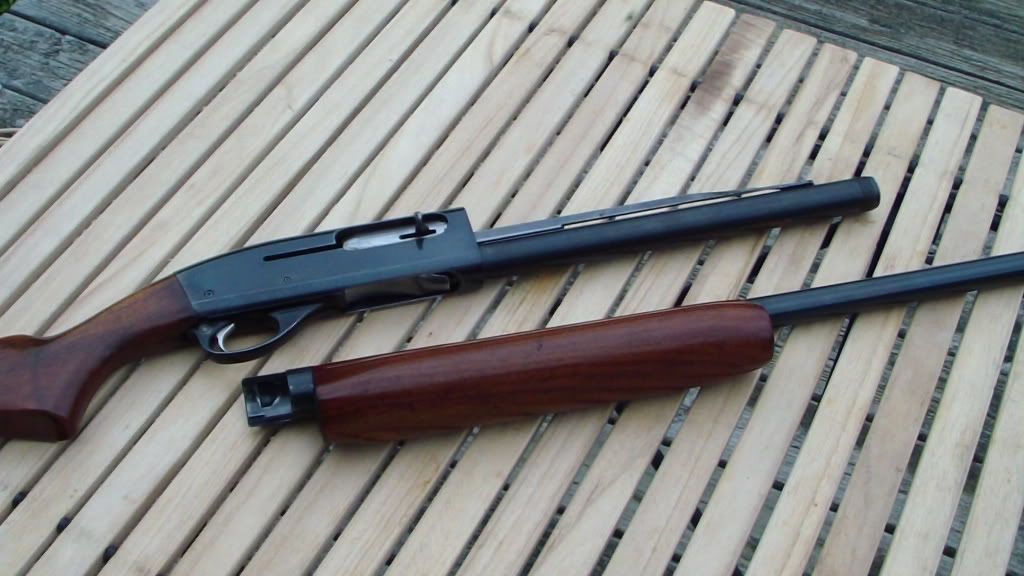
Once the cap has been removed, the barrel and forearm may be removed by sliding it forward out of the receiver.


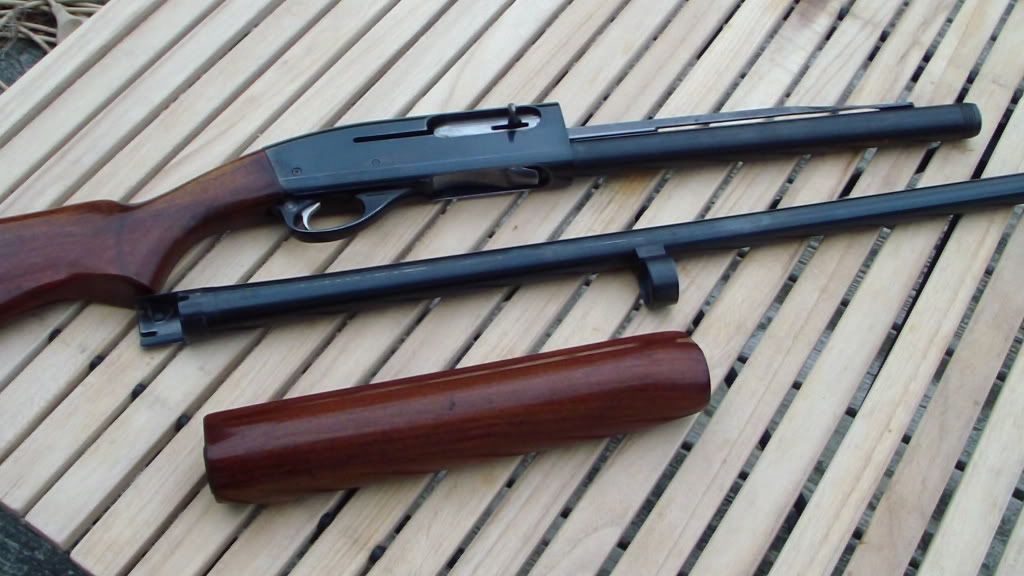
Now, the forearm may be removed from the barrel by sliding it off of the barrel ring.

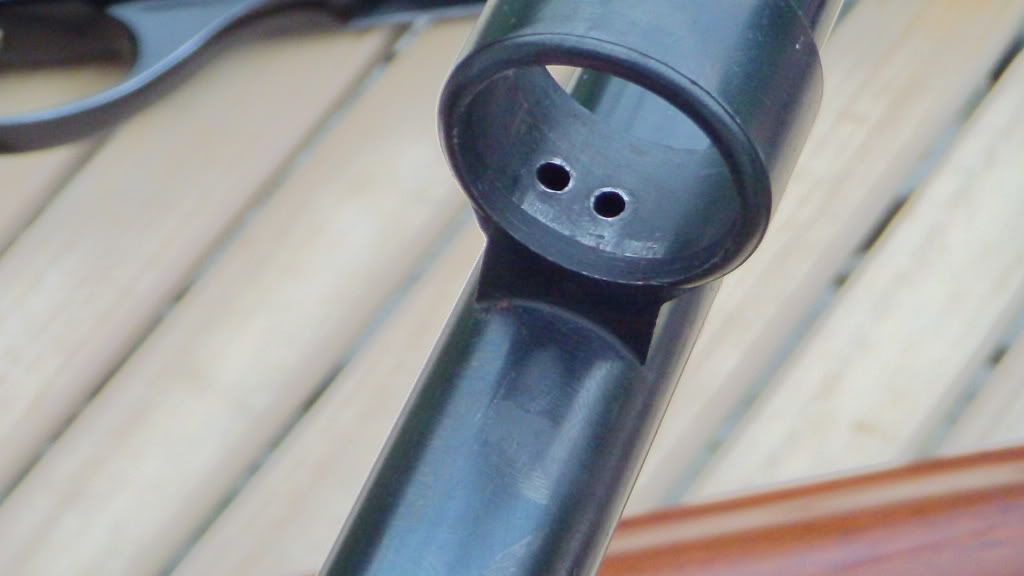
Here are the twin gas ports inside the barrel ring.  You need to make sure that these are clean and free from obstructions.

Here are the corresponding ports on the magazine cylinder.  Again, make sure to clean them out.  Also visible, the action bar on the outside of the cylinder, which is connected to the piston assembly inside the cylinder.

Here, I have opened the bolt, which pulls back the action bar and piston, to show the removal notch at the end of the action bar slot.  Note:  The bolt must be closed in order to proceed with take down -- I have only opened it here for clarity.  In order to remove the piston, the action bar must be released, allowing it to slide forward to that notch where it can be separated from the piston assembly.

Here is a shot of the action bar, showing the retaining stud which connects the action bar to the piston.  When the action bar is all the way forward to the removal notch, the front of the action bar is lifted up, removing the retaining stud from the piston assembly, freeing it for removal.

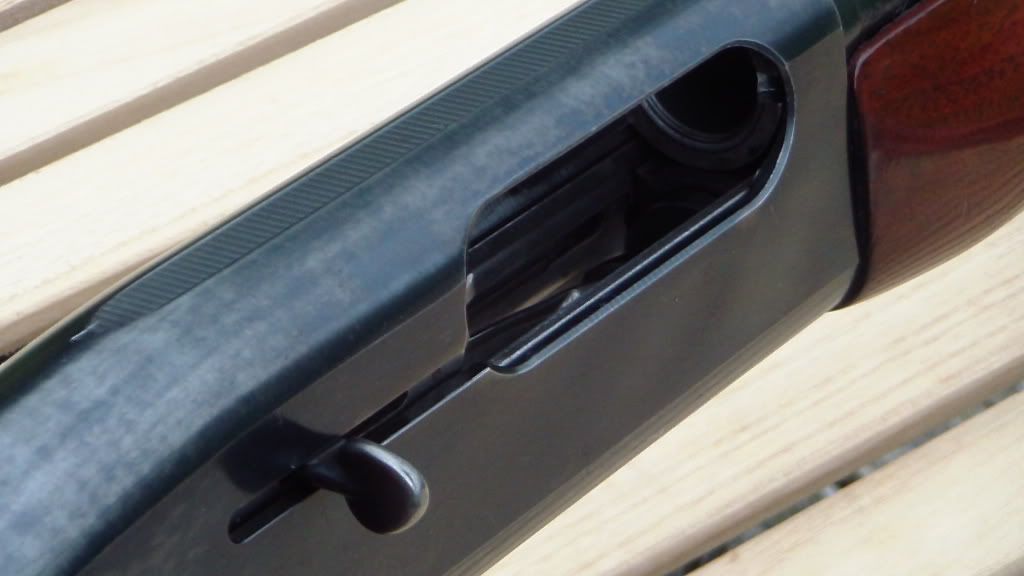
Now, to free up the action bar, first make sure the bolt is closed.  Next, you will reach into the receiver through the loading hatch on the bottom, and press in on the left side shell latch.  It is a flat bar located just inside the receiver, inside a groove against the side of the receiver.  Press the latch in against the side of the receiver, and you will feel it release, and hear a "click," after which the action bar may be slid freely forward to the removal notch.

Here, the action bar has been slid forward to the removal notch.  You can see the tip of the piston sticking out of the end of the cylinder at this point.

Holding onto the piston, lift up on the action bar to pull the retaining stud out of its slot in the piston assembly. Note:  The piston assembly is under pressure from the return spring!  Make sure you retain control of the piston or it might be ejected violently from the cylinder, resulting in injury or property damage.


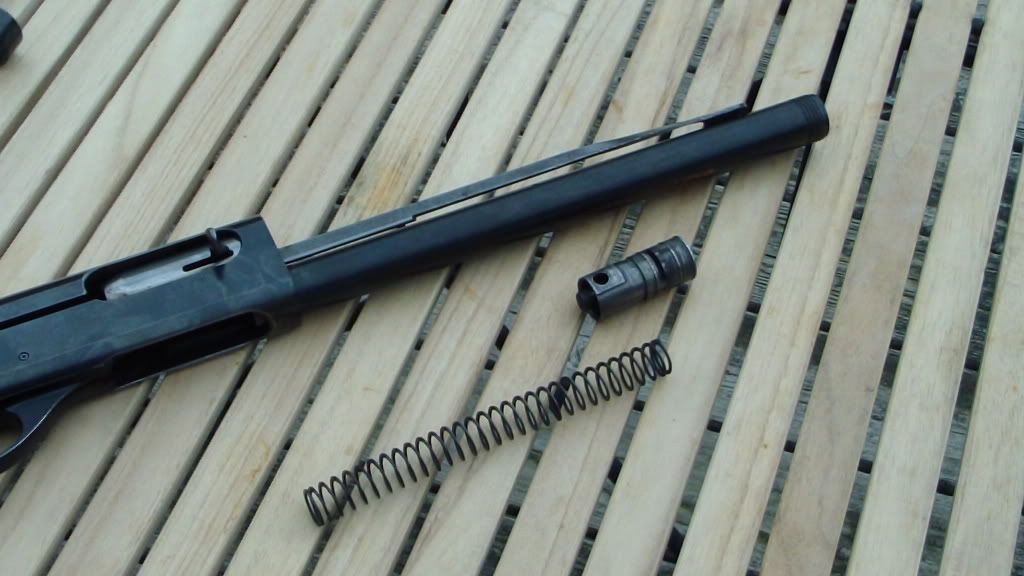
The piston assembly and return spring may then be removed from the cylinder.  The retaining stud slot is now visible as a round hole on top of the piston.

The return spring may also be removed from the piston by sliding it out of the end of the piston.

The piston, spring, and cylinder may now be cleaned.  A note on the bottom of the cylinder says that solvents and oil should not be used on the piston or the inside of the cylinder.  How one is supposed to clean these parts without solvent, or protect from rust without oil, is a mystery to me.  I just used a brass brush to knock the caked powder residue out of the cylinder and off of the spring and piston, wiped them off as best I could using a clean cloth, gave it a little shot of Rem DriLube (teflon), and called it good.

To reassemble, simply put the piston and spring back into the cylinder, push in on the piston until the slot and retaining stud are aligned, then push the stud into the slot reconnecting the action bar to the piston.  Open the bolt, which will pull the action bar back, along with the piston, and the shell latch will return to its normal position.  Slide the forearm back onto the barrel.  While the bolt is still open, slide the barrel and forearm back into place making sure the barrel is fully seated into the receiver, then screw the magazine cap back on.  Release the bolt by pressing in on the magazine follower.  And you are done.  It is not difficult at all once you know how to do it.  When I get around to removing the bolt, I will post pictures of that process, as well.
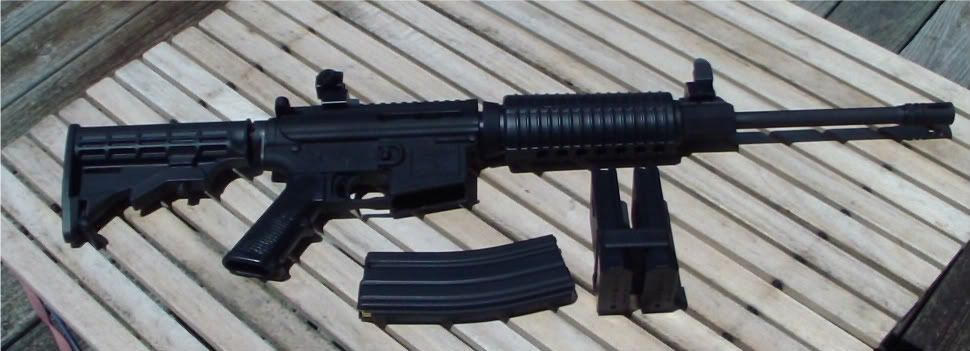
All-in-all, I am happy that I was able to get this particular gun, as much because of its significance as a piece of firearms history, as because of its fine handling and performance.  I think it will make a fine skeet gun, as well as for doves and upland fowl.  So for those of you who are looking for a good autoloader for such applications, you might consider a good used Remington 878 Automaster...  if you can find one.